Showing posts with label Wargaming. Show all posts

Thursday, 9 November 2023

Strategic Turn August 1861 - Missouri Joins the Confederacy !

"All we ask is to be let alone" Jefferson Davis  (above Confederate cabinet - see site footer

Housekeeping time. 

I am really enjoying this campaign now and feel "across" it terms of the organisation and maintenance. I can probably stop worrying so much as whether I am doing it "right" and just get on with it. I am already into the counter factual with McLennan appearing in the West. I have had a small tabletop battle with a result and with the death of a Union leader. I have promoted units in terms of their morale, applied recovery after a battle and adapted rules as I have needed to. I may come to regret the level of detail that I am building into the campaign as a result of using the 3 Map spread and eventually several hundred counters for tracking and tabletop conversion but it's what I wanted to attempt. The whole war. I worked out the other day that there are 5,600 10 mile hex locations on the map - granted perhaps 20 % of those are ocean but that is still an immense amount of detail for essentially a tabletop campaign. 

With that flexibility and scope McLennan may be doing something strange at the moment but it made sense looking down from the North to secure Cairo and with Lyons' demise I needed a commander to get the resources to where they are wanted. He can come back East in due course when needed or e.g. when Grant arrives. With an initiative of 1 to my mind McLennan is absolute Hindrance to progress but perhaps good for moving a large force which could then fight at Corp strength ? McLennan was notoriously cautious, inventing phantom tens of thousands of men opposing him and insisting on the perfect position before he would advance. No Alexander he. The army loved him precisely because he didn't throw them rashly into fights. In other words he just didn't fight ! 

August 1861 will be a little more complex as a strategic turn as I am going to need to test each sides supply nets. If a unit or stack is out of the supply net but demands resources on a die roll  then it could suffer from attrition. There is also the potential this turn for some of the Union or  Lincoln's 90 day volunteers to disband.

A Siege Phase on the map (none occurring this turn)

B Production Phase

C Supply and Consumption Phase; and

D Political Phase (Last month the Confederacy tried and failed on a D6 political roll to secure either of Missouri or Kentucky for the Union. A further roll would cost the confederacy a Tarif in Victory points so would be a risk. Neither side has secured any victory points - the tally is 0-0)

B Production Phase July 1861 

(1) Supply Point Generation Segment 

Union has 265 SP  left over from last turn and receives a further 150 points for the August game cycles. The total then is 415 points. The Union receives  90  Personnel points for 8/61 Initial Call which it uses in its entirety (see below). 

Confederates have 83 SP left over and receive supply as follows - Richmond 10,  Nashville 10, Memphis 5, Atlanta 5, New Orleans 10 (40). Confederate cities are valued at 0 this turn but unblocked ports receive 1 point. There are 15 confederate ports (New Orleans also receives a port import supply) but Pensacola and Norfolk remain blockaded in August as described in the rules by Forts Pickens and Fort Monroe respectively - so 13 for import. The total then is  136  SP.  The Confederates receive 70 Personnel Points for the 7/61 Initial Call. 

(2) New Unit Initiation Segment 

There are two ways to produce new units. Either side can simply create Infanty, Cavalry, Militia units etc. by paying the necessary costs in full in both supply and personnel points. A second option is to convert existing militia or garrison points into infantry brigades by removing relevant counters on an unbesieged department and replacing on the production spiral with a counter of the appropriate value. This is a cheaper way to create regular units in terms of personnel points.

Union 

Conversion

For the Union it costs no personnel points and 2 supply points to convert militia to regular infantry division/brigade counters. The relevant costs are 1 and 1 for garrison points. The counters appear after 4 cycles on the production spiral. 

C2806 Dep Middle Baltimore remove 2 x M2 place 2 x I2(PT1) Production spiral 12/61 cost 8  SP

A2712 St Louis Dep Missouri remove M2 place I2 (PT1) Production spiral 12/61 cost 4 SP

C3401 Philadelphia Dep East(West Counter) M2 place I2 (PT1) Production spiral 12/61 cost 4 SP 

A5309 Cincinatti Dep Ohio M2 place I2 (PT1) Production spiral 12/61 cost 4 SP 

Purchase 

20  Garrison Points - cost 20 PP & 20 SP spiral 10/61(ch.)

 4 x M2 1 x M3 - Cost  22 PP & 11 SP spiral 9/61

I6, I5 - Cost 33 PP & 33 SP spiral 12/61

2x RT (20 SP) spiral 9/61 2 x NT (spiral 10/61 (40 SP) 2 xRF spiral 11/61 (40 SP) 2x NF spiral 11/61 (40 SP) (total 15 PP)

ST 9/61 (25 SP & 1 PP)  Spiral 9/61 

Confederate 

Conversion 

For the Confederates it costs no personnel points and 1 supply point to create infantry from militia and 1 and 1 from a  garrison point. The counters appear after 4 cycles on the production spiral. 

C1640 Charleston DepSCarol/Ga/Fl remove M2 place I2(PT1) spiral 12/61 cost 2 SP 

C2024 Raleigh DepSVirg/NCarol remove M2 place I2(PT1) spiral 12/61 cost 2 SP 

B2802 Memphis DepKen/Tenn remove M2 place I2(PT1) spiral 12/61 cost 2 SP 

C2516 Richmond DepNorthVirg remove M2 place I2(PT1) spiral 12/61 cost 2 SP

B1705 Little Rock DepTransMi remove M2 place I2 (PT1) spiral 12/61 cost 2 SP


Purchase 

5 x M2 - Cost  20 PP & 10  SP spiral 9/61 

G10   - Cost 10  PP & 20 SP spiral 11/61

RF - Cost 2 PP & 20 SP spiral 13/62

RT - Cost 1 PP & 10 SP spiral 10/62

C2 - Cost 6 PP & 8 SP spiral 

2x I2, I3 - Cost 21  PP & 14 SP spiral 12/61 

(3) Existing Unit Augmentation Segment 

Each side can remove an existing infantry or cavalry unit (one per department - not besieged) and replace it on the unit spiral with the additional points. This represents an organisation returning from the field to recruit and expand and is the cheapest way to add strength to an existing counter in terms of Personnel Points. I have decided that I will allow existing bases within a counter that have lost PT status to "top up" strength points without having to achieve  PT status again or to suspend any current "clock" on that status if its still exists. PT status then is not lost for time spent on the map. Where a counter expands such that additional bases are required to accommodate the new recruits then a fresh clock should start. I will need then a further number  against every base on my roster within each counter to track that clock (from 1-5)  On "6" PT status is lost. The No Elite "NE" status goes with the conferring of Veteran status in accordance with the House Divided rules. I will try to count/track this within the tracker - the simplest thing is to apply a date in brackets for when PT is lost after the PT notation - so I4 (all PT 2) or 4-4 PT (4) NE . It will be "a lot" but hopefully by stating the date and not setting a timer I will have to note just once. 

I think I could start off by noting by exception to 1/62. Any veteran status stands or counters will be noted. Any counter or stand not losing its PT NE status in 1/62 will be noted in the tracker. Over time adding new counter status or shifting it with counters to the spiral or on a merger between different aged units is all I will need to do. 

Union

I am not taking this option this turn which is perhaps a wasted opportunity

Cost infantry - 1 personnel point, 3 supply points, 4 time cycles 

Cost cavalry - 4 personnel point, 5 supply points, 5 time cycles 

Confederate 

There are no small infantry units to augment available on departments 

Cost infantry - 1 personnel point,  2 supply points, 4 time cycles

Cost cavalry - 1 personnel point 4 supply points, 2 time cycles 

(4) Produced Unit Deployment Segment 

Union 

The Union has 5 x M2 (PT0) strength points to distribute (I will mark PT0 on the roster to set them apart from other on-map Militia which will at present have a clock with "1" on. I will place these on each of the departments in St. Louis, Cincinatti, Evansville, Baltimore and Philadelphia as well as 20 Garrison strength points so G4(PT0) on each. 

Confederate 

10 Militia Points and 15 Garrison Points. M2(PT0), G3(PT0)  on Little Rock, Raleigh, Charleston, Richmond and Memphis. 

(5) Brigade Merge Segment 

Both sides can merge existing brigades (one or two point infantry units or 1 point cavalry units) with division counters (I3 + or C2 +) located in the same hex. I think the brigade bases in this instance can simply sit separately with its existing PT status as a base or join an appropriate base of the same PT status. If this is not possible I will try and achieve a sensible result with the PT status being diluted on average in terms of its ageing or by some other appropriate averaging mechanic. 

Union 

A2014 Rolla I2 merges with I3 (now I5 (Crack 60 % Sigel 5-6 1st and 2nd US infantry, Deitzler  4-4 PT  NE 1st Iowa and 58th, 68th and 76th Ohio Regiments) 

Any final M2 units in Beauregard's stack are merged into the larger units at  C2409 Manassas Junction

(6) Fort Production and Deployment Segment 

There are some spends that have been  programmed in for Washington for the Union and Richmond and Vicksburg for the confederates (the latter commencing this August turn). The question for both sides is if they spend on fortifications elsewhere. 

In July I commenced works for the Union in St Louis which will continue. 

Union

2608 Washington fortification programme - X2 placed (24 " of Field Works) for August (no new building see schedule). Upgrades to Fortress in 13/61 

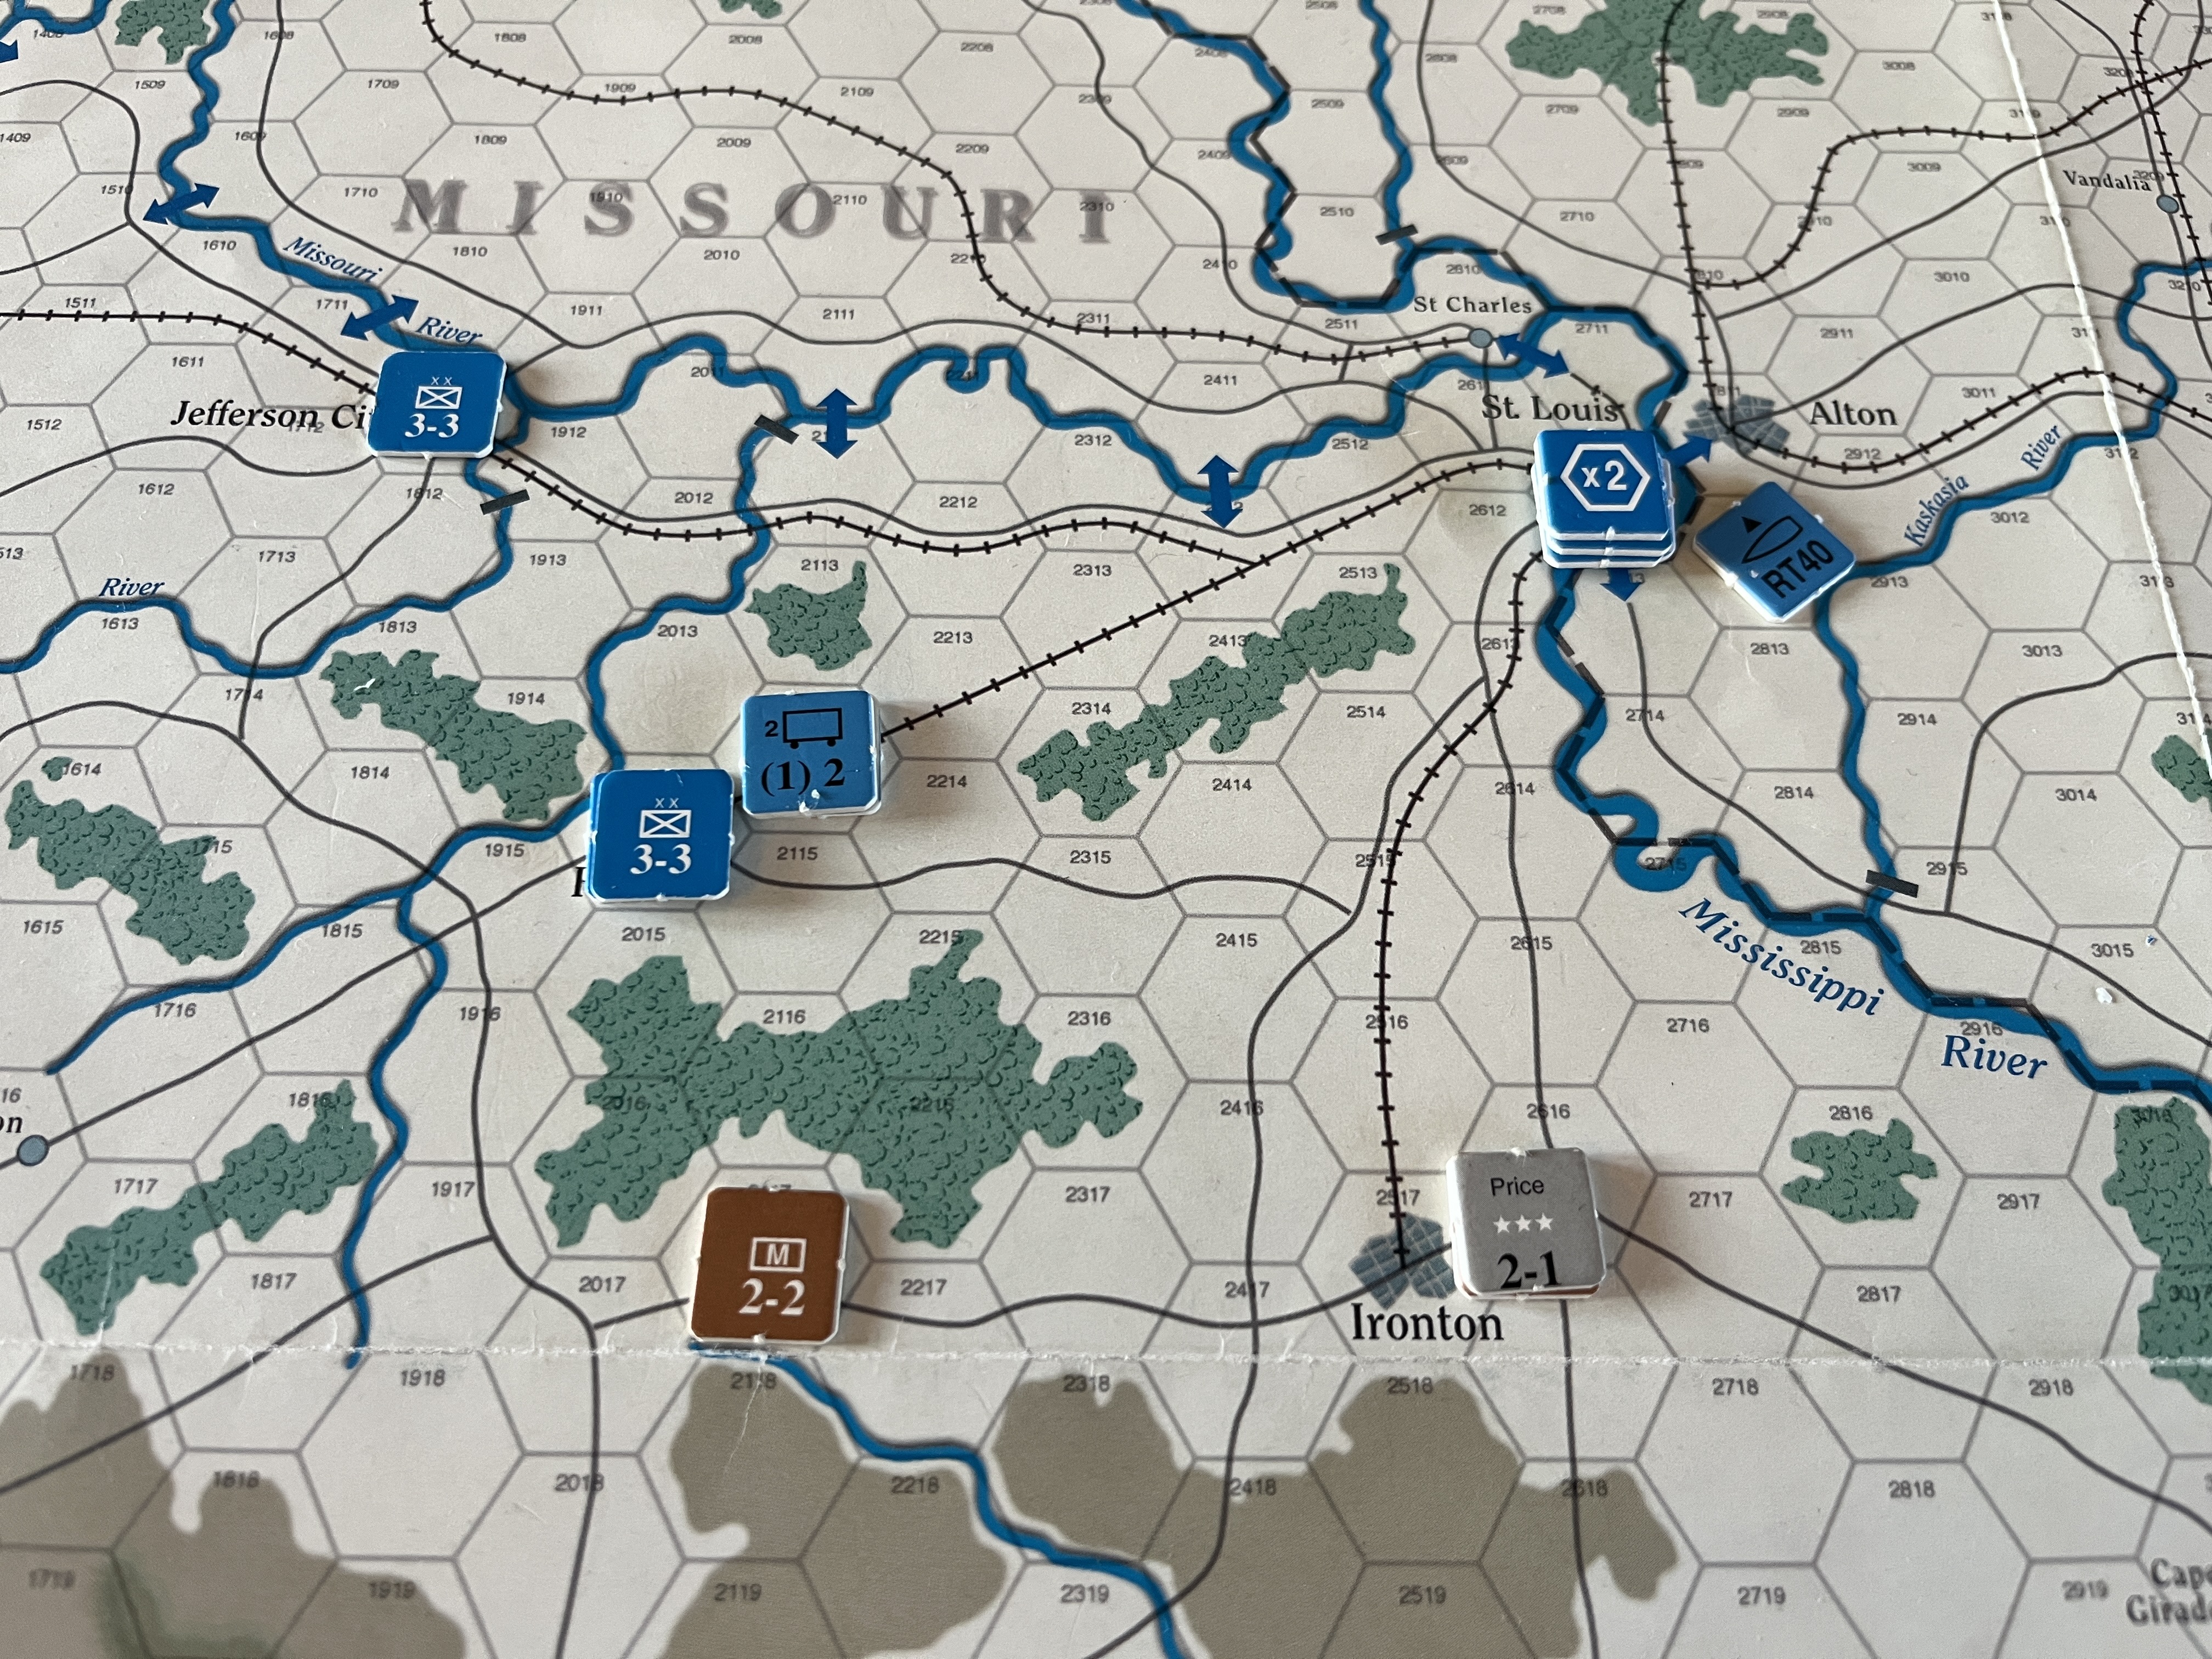
St.Louis- X2 placed in July (24 " of Field Works 2-5 SB-SG  - further instalment of works will appear on October 1861) 

Confederate 

Richmond fortification program (see Start Summary on 2516 Richmond) - X2 placed (24" of Field Works for August see schedule)

B2317 Vicksburg Fortress Mississippi first instalment - (12" of Field Works)  

(7) Department Deployment Segment 

Union

No department this turn

Confederate 

Department to be placed on New Orleans, Dep Miss/Ala. Had a debate about placement on Atlanta. I think a department should be placed there in November the next time an option comes up. 

(8) Headquarters Deployment Segment 

Union 

Needs to Roll 1 on a D6 to place D6 Corps HQ - rolls 5 so no placement in 7/61

Confederate 

eg

Needs to roll 1 on D6 to place 1D6  x Army HQ counter - rolls 6 so no placement in 8/61 

(9) New Historical Leaders

Check back for promotions also 

Union 

Banks ** 1-1 


Nathaniel Banks was a political appointment by Lincoln. His initial contribution, assigned to command in Southern Maryland/Winchester  was to allow the forces in the Shenandoah to slip away and reinforce at Manassas Junction prior to Bull Run. A lacklustre contribution to the Shenandoah campaign against Stonewall Jackson's "foot cavalry" was to follow. Dismissed from that command he was appointed head of the Union forces tasked with invading the Confederacy from  New Orleans. He was eventually stood down after the disappointing Red River campaign in in Trans Mississipi/Louisiana. With an initiative of 1 and combat skill of 1 he is useful for moving a divisional counter and a brigade together with an initiative "chit point" but is unlikely to be able to order a strategic movement very often under his own steam. He could of course "amplify" the command of a Corps, Army or Army Group commander. 

Banks is placed on Baltimore to potentially lead a marine invasion 

Halleck ***** 1-2-0


Soon after the commencement of the war Halleck was appointed to command the department of Missouri in the West. The tide of war in the West went well for the Union with the capture of prizes such as Fort Donaldson and Island number 10. Halleck was to have a tempestuous relationship with his subordinate Grant. Grant would remain Halleck's subordinate as he was appointed to Army Chief by Lincon in 1862 in replacement to McLennan after the failed Peninsula campaign. Eventually Grant was given that supremo role by Lincoln with Halleck moving into the post of Chief of Staff. Potentially a 5 star General is able to command several field armies with no loss of initiative, command span or combat value.  Halleck only has an initiative of 1 and command space of 2. His command skill of "0" would be a positive disadvantage on the battlefield. 

I have realised that it's OK with an Army commander to situate them behind the front line. In effect they can exert influence when they have an appropriate HQ. Halleck has been sat behind a desk in Washington to potentially direct McDowell from there. 

(Stoneman ** 2-1) 

Stoneman began the Civil War in charge of Fort Brown Texas but refused to surrender to Southern sympathisers. Rather he escaped with most of his command and was given command of the 1st US Cavalry. When McLennan was given command of the Army of the Potomac after Bull Run he appointed Stoneman who he knew from time in the West Virginia campaign to command his cavalry. Division and Corps commands followed prior to a further cavalry appointment. Stoneman completed the war as a cavalry commander in the Department of Ohio in the West followed by an appointed under Tecumseh Sherman raiding behind confederate lines. After the War he had appointments related to reconstruction in the South but in 1882 he is elected Governor of California. He died in 1894 aged 72. 

Stoneman has an initiative of 2 which is the best we are getting this round for the Union. He is in parenthesis so he is a Cavalry commander. He will not suffer any loss of ratings if he is placed in control of a Cavalry Corps. This seems strange though as he is a  ** division commander who would normally suffer a drop in values if placed in command of a Corps. I'll not worry about it overly and cross that bridge. 

I have placed Stoneman in the new Union department in Evansville on the Kentucky border.

Confederate

A.S. Johnston **** 2-3-1 to be placed on Memphis. 


The Confederates get a single but pretty decent commander this turn - Albert Sidney Johnston. Johnston commanded the Western Theatre for the Confederacy until he death from a bullet wound to the back of the  kneed to Shiloh on April 6 1862. He had sent his surgeon to treat Union wounded and could have been saved himself by the application of a simple tourniquet. Johnston was the highest ranking casualty on either side. His death was a real blow to the cause and a sad loss for Jefferson Davis who considered him his most effective commander at the time. In April 1862 Lee was yet to take up command in the East.  

He was said to have had one in his pocket on his death. I will try and keep Johnston out of the firing line so that he can fulfil his greater purpose of field command of an Army HQ as a **** general when one becomes available. 

Albert Sidney Johnston has been placed on Memphis. 

(10) Confederate Replacement Segment 

Does not operate until 1862 but is a useful mechanic when it comes allowing garrison points to be sucked into line infantry counters as replacements. 

(11) Militia Demobilisation 

This will apply to the Union  for  August 1861. Union will need to roll a  D6  and on a result of 1 or 2 the militia points on the map are immediately reduced by 50 %. 

Union rolls a 4 so no demobilisation for the Lincoln 90 day men this turn. 

If a further incentive is needed to convert Militia  I have decided that the in-campaign promotion of all newly recruitment units so that they lose their PT status at 6 months will not occur for Militia who will also be unable to progress beyond morale level "Green" i.e they will not be able to promote to veteran and lose their NE ("No Elite" status) which applies in close combat.

C Supply and Consumption Phase

Union

The Union has 146 SP left following Production and Deployment.

The Union expends 17 points on maintenance supply so 129 SP are left and then 122 after broadcast (see below)

Further broadcast may be needed once the map is set up. I should ensure that each command has adequate combat supply going forward or is in supply/access to a depot. 

The Supply Train with McLennan is boosted to 5 points using the River The Supply Train supporting Heintzelman at Rolla is boosted to 5 points which costs 4 rail transport points as the  Supply Train is on the railway but not touching the River. 

Confederate 

The Confederates have 44 SP left following Production and Deployment. Testing for supply maintenance across all stacks reduces the total by a further 16 points. So 28 in total and then 23 after broadcast. Supply trains while expensive can just leave points on the map in the middle of nowhere which is quite useful. They can also accept broadcast directly. The difficulty with depots at this early stage is that they require 2 strength points of ground forces to create and the confederates are desperately short of manpower in the West. 

I need to consider further broadcast once the map is set up again. This results in boosting the supply trains at Little Rock and Memphis by 2 and 3 points respectively 

It might be useful to start to build up supplies in key strongpoints. 

D Political Phase July 1861 

The current political score for each side is 0. The only result that could be obtained by either side on the political tables in August 1861 is for the confederacy. On a roll of 1 on a D6 Missouri will join the confederacy and on a 2 Kentucky. This would cost the confederacy 1 victory point which would swing the point total to + 1 which would provide in a subsequent turn a roll with a chance of Kentucky going to the confederates and Missouri to the Union. Equally perhaps the Confederates should seek to win on the battlefield, gain a point and appeal on the -1 column. This could cause a foreign intervention shortening the war for the Union to 26 further months and doubling all confederate imports. 

None of these results are guaranteed but the chance of bringing Missouri or Kentucky into the war on the confederate side is possibly worth the gamble. There is a 50/50 chance of winning the battle against the Union main field army and then a 50/50 chance of getting some result on the matrix. Obviously a foreign intervention would be fantastic but a result following that route is a 1 in 12 chance of foreign intervention and a 1 in 6 chance of picking up Missouri or Kentucky overall then 25 % whereas a straight roll now giving up the chance of foreign intervention would yield a result with a 33 % chance. 

So the confederates need a 1 or 2 - A 1 is rolled and Missouri joins the confederacy. The table still moves to +1 with a point being given away. 

I am using the Kentucky/Missouri variant. The confederates will receive the following additional Supply Points :-

September 14 October 10 November 6 December 4 January 2 (Total 36) 

The Union has huge sympathy from the German population in Missouri and will receive the following Supply Points :- 

October 7 November 5 December 3 January 2 and February 1 (Total 18)

On interrogating the charts there is a similar 2 to 1 points split in favour of the Union were to invade Kentucky. Once ready the Union could do this in the knowledge that they would have an easier access route to the vital trans-confederacy railway and the heartlands of Tennessee. If a massive Union force was built up it would not be so burdensome if the Union could secure early victories. 

It is clear that Kentucky is unlikely now to come over to the Confederacy prior to significant battlefield victories. The Confederates should not invade Kentucky as the points for the Union are significant and also they may lose the possibility of adding 4 cities to their supply total. 

In short then the Confederates should wait and see what the Union does in Kentucky. It is likely that they will lose patience and cross into Tennessee and invade the heartlands of the Confederacy. There is something to be said for having access to Columbus in Kentucky for the Union on the same side of the River as Union City which is currently the confederates plug in the Mississippi bottle. Given their points total advantage and the clock running against them it would not seem wise to delay too long. It would however take the border of the Confederacy to the Ohio River. On balance I think the Union will invade Kentucky in not so long if it cannot secure its confirmation of Union status politically. The give away in personnel points to the confederates is not significant.  I am not sure how neutrality could ever work in this situation however large portions of the population were sympathetic to either side.  I can imagine that Lincoln will be fretful about his native State going the way of Missouri and will be hounding his Generals to secure at least those parts of the State sympathetic to the Union in East. 

I will now update the full summary of counters and brigade bases to take into the account all of the activity for the 8/61 strategic turn.  The next stage is to do a chit draw for initiative and to carry out the first game turn proper (of 4) for 8/61. Years in the game have 13 sets cycles of 4 turns. 


Monday, 6 November 2023

Week 2 July 1861 - McDowell Crosses the Potomac


"Colonel there is no use dodging. When you hear them they have passed"  

Joseph E. Johnson to a flinching Colonel on the Peninsula before he was hit himself. (see site footer)

Northern newspapers are trumpeting the victory in Missouri and there are outpourings of celebration but also national grief in respect of the fallen hero Lyons. Lyons is the first General Officer to die in the war (again and thanks to my stupidity in attaching him to a confederate brigade in the thick off it - history repeats itself and the Union loses its highest initiative commander).  News also reaches Richmond of the set back at Rolla. Jefferson Davis is under pressure from the public and there are calls to eject the Yankee invader from Virginia. The Confederates can wait for the Union to make a move. The historical reality at this point is that both hoped thought that one decisive battle in the East would settle the matter. I could be cautious for the Union however tying down large amounts of troops to protect Richmond is an end in itself. 

Joseph E Johnston is technically the senior officer in the field on the confederate side. I am not sure of the extent to which he and P.T.E Beauregard would have cooperated daily but we know historically how they managed to mass their troops at Mannasses junction to defeat the first union thrust at Bull Run. 

In essence the strategic position on the map overall is largely unchanged apart from the set-back for the confederacy in Missouri. I discussed the overall strategic position in my post for the first turn here . It's almost 3 months since I wrote this piece so I have had to remind myself of my initial conclusions. 

The CSA elects to take a guaranteed "2" as their initiative chit drawer. The options then for the Union are 0,1 or 3. I let my wife draw the chit to avoid any bias karma infiltrating the cardboard and a "1" arrives. The union will finally be able to perform some guaranteed movement but after the Confederate turn. 

Confederate Moves 

(1) Price uses a Confederate initiative and orders the M2 and C1 counters (The surviving elements of Weightman and Cawthorn's brigades of the  Missouri State Guard) with him to move. The Cawthorn's cavalry counter moves as far as Ironton A2517. Weightmans Missouri State Guard brigade (M2) marches as far as A2117. Ironton is in supply (being 3 infantry move points from the Mississippi). It also continues to threaten St. Louis as the Missouri railroads can be used by either side while Missouri remains neutral. Although Price's force is possibly no longer a real threat but could be reinforced by Polk in the South. 


(2) As a backfill to logistics (I forgot to consider combat supply in the first turn I am going to allow the confederates to broadcast 6 points to a new depot at Manassas Junction. An I2 counter will be lost to make the depot. 

(3) For the second initiative move the supply train at Manassas Junction is going to ship 4 supply points to Winchester.  I think the stack at Winchester C2108  requires access to combat points in case it is attacked or wants to attack 

Jo Johnston is able to roll a move initiative - 3 or less on a D6. 

(4) One of the I5 divisions sloughs off an I2 brigade which will remain at Winchester and Jo Johnston and an I5 and I3 march to reinforce Beauregard at Manassas junction. If McDowel decides to attack he will be facing a much more even fight now that 8,000 troops have joined Beauregard at Mannassas junction 

Those are all the confederate moves.

Union Moves

McDowell in command of the first corps HQ can move 3 divisions within the corps and an additional unit or division as a *** leader. He crosses the Potomac with the I9, I6 I6, I6 counters. I think it could be wise to concentrate additional forces before an attack. There is an I5 division next door in Alexandria and a further I3 veteran division in Washington. It may be worthwhile switching in Mclennon  prior to attack but then again McLennan has an initiative of 1 so he may not be able to attack in any event ? The command and control in War Between the States is somewhat frustrating but I quite accurately. In early 1862 for example Lincoln was unable to get McLennan to attack for many months and then again on the Peninsula he was continually plagued by over-caution and over-estimation of the force opposing him. Lincoln was continually frustrated that having built an army McLennan was not particularly disposed to use it. 

McDowell has an initiative of "2" so on a D6 he should be able to give combat on average at least once every 3 months.  Any battle at the moment would be a broadly equal one. 

From a personal point of view it will commit me to a good 1-2 month's painting as I think I will need about 50-60 more small 20 mm square bases each of Union and Confederate infantry (4 x 10 mm figures to a base and 4-6 making up a 3 inch square volley and bayonet brigade bases. As the war progresses the figure requirement is only going to increase. By 1862 both sides could have as many as 80,000-100,000 men in the biggest field armies in the East and West. An 80,000 strong force will need around 40 x 3 " stands on each side which is 240 bases or close to 1,000 figures a side. There is no getting around it. I think the table sizes will also increase to about 9-12 feet x 4-6 feet for some of the battles with a corresponding requirement for scenery. This is the whole point. If I can get to that point then essentially with whatever rules I ever use I will be able to field two decent size armies. I will be set up for good. 

The Bull Run size battle will be a good half way point to reach for with my modelling. 

Despite my immediate concern over the painting logistics I think the pressure from Lincoln would be too much and for historical accuracy I roll for an attack. McDowell fails for this turn but already the conveyor belt for infantry stands is back in motion. 


Heintzleman who is currently at Evansville in Illinois manages to activate (roll of 1 on an initiative 2). A leader can travel normally by rail without having to use a rail point. He moves to Rolla to take command of  the Trans-Mississippi theatre. 

That ends the Union movements and the weekly turn. I will update the living tracker. If the Union can make a combat initiative roll next turn they can attack ! 


Friday, 3 November 2023

The Battle of Rolla - 7 July 1861 - Lyon versus Price


"You will soon be in a pretty hot place... but I will be near you, and I will take care of you; keep as cool as the inside of a cucumber and give them thunder !" General Sterling Price 

"In less than an hour they will wish they were 1,000 miles away" General Nathaniel Lyon 

(Wilsons Creek)

(above; Lyon leads the Union infantry column from Jamestown where it has detrained along the road towards Rolla and the waiting Missouri State Guard of Sterling Price) 

These two quotes are from  the commanding officers at Wilson's Creek which took place in August 1861. My campaign uses a historical starting position for units across the main theatres of the American Civil War and the logic of strategy has again thrown these two combatants together on the tabletop. At stake the confederates forward position in the Trans-Mississippi and Missouri.  For Both Sterling Price and Nathaniel Lyons this is deeply personal. Lyon the hothead abolitionist and former commander of the 2nd US infantry who thwarted Price's plans to seize the arsenal in St. Louis.  Price the former Missouri State Governor and a slave owner and planter. After a decade of bloodshed next door in "bleeding Kansas" over the issue of slavery Missouri rapidly erupted at the very outset of the Civil war. 

As a quick recap this battle is taking place in week 1 of the July (7)1861 turn at Rolla. The on-map counters represent two small mixed forces of infantry and cavalry totalling 6 and 4,000 men respectively. 


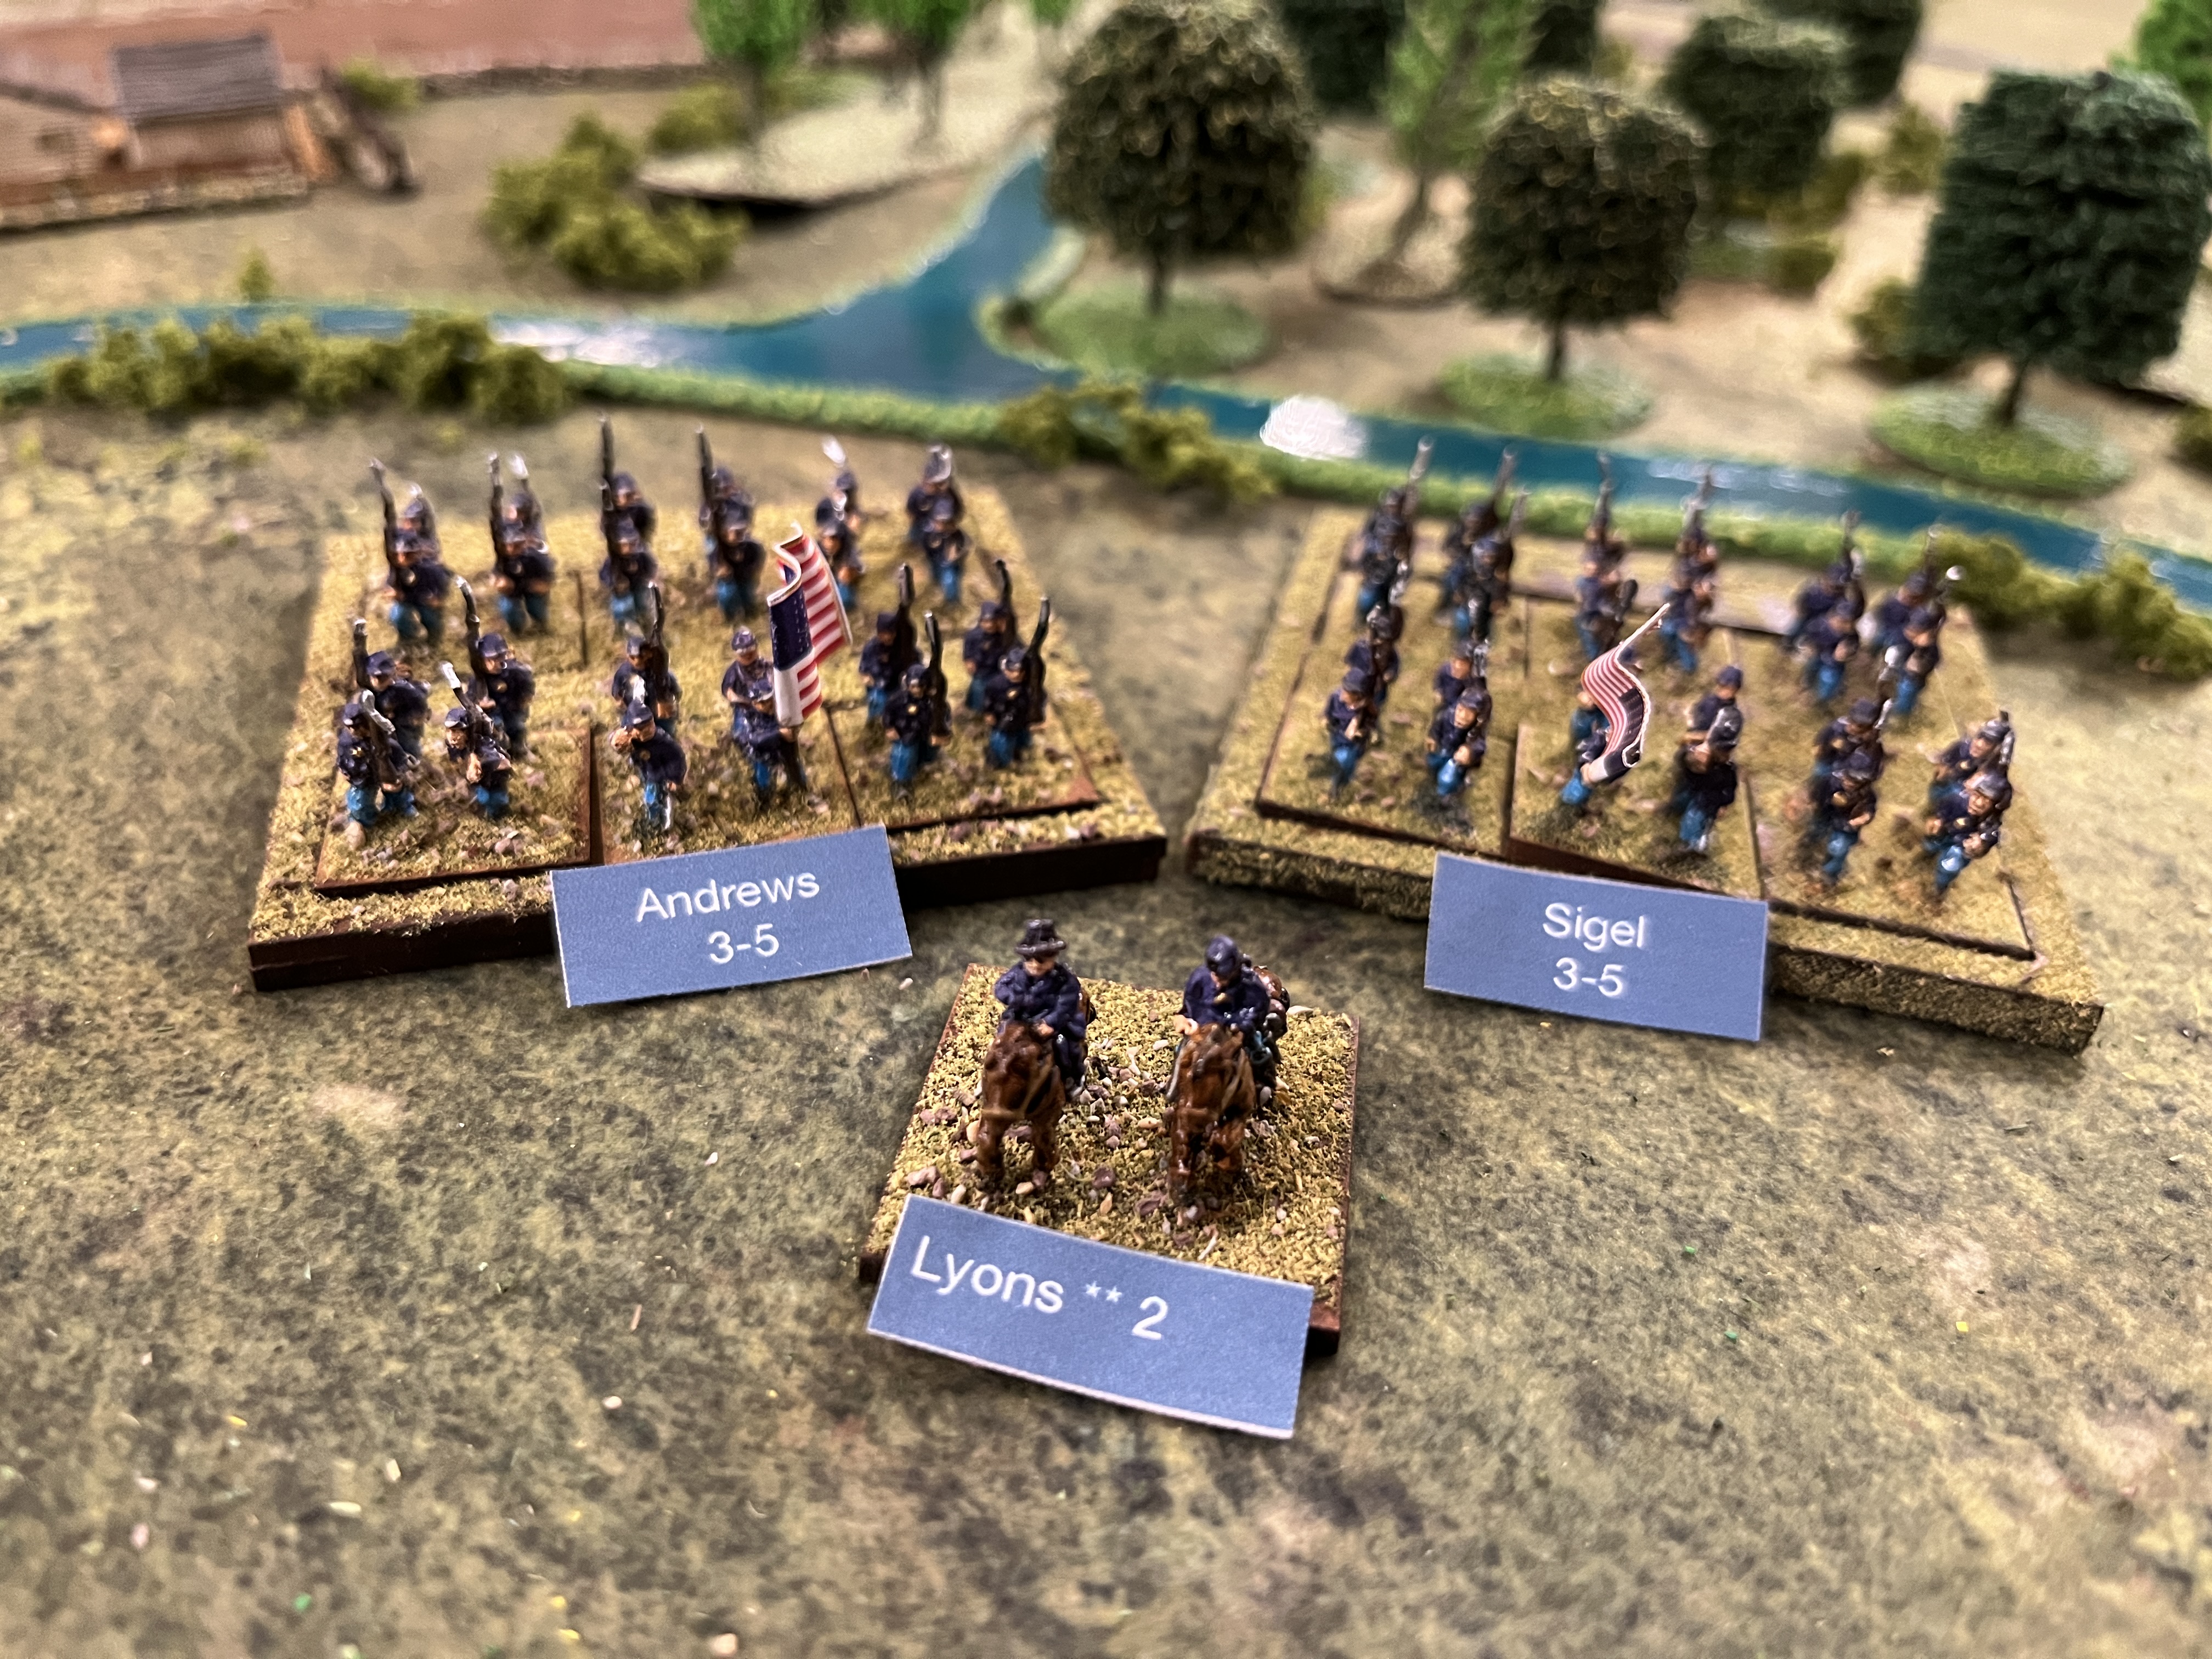
My Order of battle for the Volley and Bayonet tabletop battle picks up known units from the forces in the State at the time. You can find a fuller description of the characters and units I have imported into my battle of Rolla here in a prior post.

I can show the Order of Battle with my new labels which I have printed up in smart Union Blue and Confederate Grey.


The I3 counter breaks down into two 3-5 brigades. The counter is stiffened by the presence of regular US army troops hence its higher starting morale at the onset of the war. Switching between strength points in counters and strength points on the tabletop is relatively easy as they translate as 1:2 (1,000 to two lots of 500 men). The whole Union force will operate as a single command under Lyon who has a combat strength of "2" on his WBTS counter . I have decided that this should receive a +2 for morale if he attaches to a unit (similary Price will provide +1 for his combat rating from WBTS - this is the normal modifier for an attached divisional commander in Volley and Bayonet in any event). The translation from map to tabletop won't always work for leaders present etc. but I will do what is sensible to get it on the table and then translate the result back to the counters. It is as much story as science - we must never forget that we are grown men (usually) who paint model (read toy) soldiers and wargame (read play) with them.  


The C1 counter for Sturgis' small cavalry contingent is represented here with my mounted and dismounted (linear) bases - 2-5 [s][s] At Wilson's creek Sturgis took over command from Lyon who was killed leading an infantry regiment. Sturgis' base can break down into 2 dismounted square skirmisher bases as per the V&B RtG post Napoleonic rules for "light cavalry" noted in the V&B House Divided campaign rules (which I can find as version 4 online). This is a linear infantry base when working both bases work together. I am nothing if not proud of my new dismounted cavalry bases complete with horse holders.


Finally not represented as a counter but modelled within the division are Totten's artillery. I have not yet modelled the limbered units. 


The M4 map counter breaks down into two 4-4 PT NE brigades. The infantry regiments of the Missouri State Guard are poorly trained and have No Elites so will suffer a disadvantage in melee on a drawn roll. I have not made up a command base for Price but have stolen the command base from a spare Missouri cavalry unit. 


The C2 counter breaks down into two linear infantry dismounted bases for Rives and Cawthorn - 2-5 [s][s]. The first base has broken down into its dismounted skirmishing constituents. The "village" over to the left of the picture above can take a single skirmisher base under the Volley and Bayonet rules. In terms of scenery generally I am playing it very light in terms of features for this first game. Most of the linear features will be treated simply as scatter scenery. Woods, streams, built up areas, roads and hills will have an effect but I have not littered the battlefield with snake rail fence or stone walls which were not in abundance in the "young" lands of the Western theatre. The advice I have picked up generally is "if in doubt" then put on more trees ! I do need to settle on a random generation method. 


I have created this battlefield from the modern day map of Rolla online and google arial photographs stripping back to 1861. 


Here we go ! 

For such a small battle I am just going to have Lyon arrive, deploy and go at it without drawing for wing placement and so on. The Union begins as the attacker. I have placed the lead elements of Lyon's small column alongside the road and railway coming from St. Louis. 


I originally intended not to provide a blow by blow account but I have ended up with a fairly full account of the action. 

Turn 1 - 7 am 

The Union is the attacker and moves first. 

Using the road the two Union infantry brigades form line from march column once across the shallow ford of the Franz Brook. This takes half of their move allowing them each a couple of inches to fan out. The artillery remains limbered. Sturgis' cavalry brings up the rear in march column and forms up when it reaches the ford for half a move. 


There are no morale checks or combat. Lyons must decide whether to advance to meet the union troops. The Confederate artillery is manhandled forward into range and a cautious advance begins. The Union troops come under ineffectual long range artillery fire from Guibor's artillery battalion. 


Turn 2 - 8 am 

The union side advances and both infantry brigades will need to take morale tests for being in close range of the confederate artillery. Both Union brigades pass their morale test. The confederates do not need to test as the Union artillery is not in close range. 


An exchange of fire results in a casualty for Sigel's Brigade and Sturgis cavalry on the union side and on the confederate side for Slack's Missouri Militia. The confederates need to decide whether to charge however given that they are "green" and will fight at a disadvantage in a melee Price decides to slug it out at  range. There are no casualties from the resulting firefight despite the Union return fire being from some stands declared as stationary after their move. 

Turn 3 - 9 am 

Totten's artillery is manhandled forward seeking close range. No other units move. The Confederate infantry is now in close range of artillery and must also test for morale. Sigel's union brigade fails its morale test on a 6 and becomes disordered as does Guibor's confederate artillery battalion. 

The firefight now becomes bloody. Sigel receives another casualty as well as Andrews. Lyons attached to Andrews brigade which made them immune to morale tests however it is a disaster - a second 6 means that Lyons is a casualty. Weightman's Missouri State Guard and Rives cavalry suffer a further casualty. As the skirmish stand is on its own (the second is in the farm/village) it is removed entirely.

Lyons is removed from the battle - the roll for his fate is a simple one. As it is not a melee I do not think a capture option is realistic and as such I perform a  straight die roll - 1-2 he is killed outright 1-4 he is wounded for 1-6 strategic turns. A One! Lyons slides from his horse taking a mini-ball through the neck as he turns to urge his men to pour it into the confederate lines. I swore I would not re-roll, skew or backfill any result unless I have got the rules glaringly wrong. I added Lyons to the combat as I intended to charge at some point and try to rout one of the Confederate brigades. Once the Union brigade had suffered casualties from ranged fire there was a 1 in 6 chance of his being casualty with the most likely result being an injury for a couple of months. I thought the Union could live with that as Heitzleman is waiting in the wings in Southern Ohio. The small union force rode its luck and lost.  I have learnt the lesson the hard way for the Union. Do not attach a commander to a combat unless it is critical and possibly only for a melee. Commanders on horses were obvious targets. Overall there was a fair chance of not surviving the war. 

The Union units will now be permanently out of command for the remainder of the battle which means that :-

(a) They cannot move close to the enemy and only move at half movement allowance becoming disordered if they do so;

(b) They cannot recover from disorder;

(c) They cannot become stationary (not good for Totten's artillery which will now be pinned to rolling a single dice); and

(d) artillery cannot limber and unlimber; 

Already by 9.30 am the union battle plan is in tatters and there is nothing for it but to slug it out toe to toe with the confederates. I am not sure that I actually had any other plan for them ! Without a commander they cannot now press the charge home. The Union should not have been so cautious and delayed the charge. Another lesson learned. 

Below :  the confederate line holding either side of the Jamestown road with the newly built (red) Rolla courthouse in the background. I am so glad I looked this up and painted this. I am going to try and model something every game if I can and grow "the look" as I go on. I didn't manage to get the crops done for this battle but presumably we can still have wheat fields in later in July and August. 

It will be a close run thing. Slack's brigade fails its morale test giving Sigel the opportunity to successfully save against a hit. The return fire from Sigel's brigade is withering causing two more casualties. Andrew's 2nd US Infantry suffers another casualty which totals 5 in all so the Union will need to make an exhaustion throw at the end of the player turn. Cawthorn's cavalry suffer a casualty at the hands of Sturgis' combined 1st US cavalry and 2nd US dragoons. A final defensive salvo causes a final casualty to Slack's Missouri militia who evaporate on the battlefield (the stand is removed with four casualties). The Confederates now total 7 exhaustion with 4 casualties occurring in the current turn.

The Union must roll 2 or more on D6 to avoid exhaustion. The Confederates need to roll a 5 or a 6. As Slack's brigade stream off the battlefield the confederates suffer a catastrophic failure of morale. The entire remaining confederate line is permanently disordered where it stands. Any stands that were already disordered would have routed. The confederate line is now at jeopardy on all future morale throws. 

The ability of any forces to stand and fight on through exhaustion could confer a benefit after the battle in any event for the veteran divisions of the union. 

Turn 4 10 am

Price attaches himself to Weightman's militia regiments to stiffen their morale. All of the Confederate's remaining units pass their morale tests. Sturgis' cavalry fails its morale test. Already suffering a disorder they rout to the rear - they are a linear infantry stand collected together and not skirmishers so do not get removed on the spot). While routing they suffer a further casualty however and are removed from the battle on their "tally". Both lines are now thinning. All stationary markers have now been removed due to exhaustion which will reduce the fire of both sides.


Sigel's brigade and Totten's artillery direct their fire at Guibor's artillery which suffers an unsaved hit (the saving throw is because Sigel and Totten are disordered). Sigel saves a returned hit. There are no further casualties along either line. The Confederates and Union pass the exhaustion test. 

As the confederate skirmishes in the village are out of command they are unable to move out to both get into range and to attack Andrew's brigade in the flank. They can however retreat and suffer a disorder in order to approach once in command (I realise subsequently that this would have caused a rout) All of the Union brigades pass their morale tests. Weightman's brigade fails its test and routs. As it must move 16 inches it will rout off off the table. The confederates survive their exhaustion throw. 


The confederate infantry stream from the battlefield. 

Turn 5 11 am 

Sigel's division is able to advance toward the town of Rolla to take up defensive positions without moving closer to the remaining confederate cavalry on the field of battle securing the town of Rolla and threatening the Confederate supply lines. Once the Union infantry are secure in Rolla it will be next to impossible to remove them with dismounted cavalry. Totters artillery is unable to move and bring its fire to bear on the remaining confederate close order formation on the field as it is out of command and cannot close with Cawthorn's Missouri State Guard Cavalry brigade. It is however disordered and as such would rout if moved while out of command. 

Rives cavalry brigade then fails its morale test and routs. Firing is ineffectual but at the end of the Union turn the Confederates fail their exhaustion test by rolling a 1. As Cawthorn's State guard are already disordered they rout leaving the field. The Union holds the field and the town of Rolla.  Lyon's sacrifice has not been in vain.


Immediate Aftermath of the Battle 

Price's forces withdraw from Rolla for 1 hex taking the road toward Springfield. Thankfully without a leader the Union forces will be unable to pursue and give battle but for now the confederate forces in Northern Missouri that were gathering to threaten St Louis have been checked.


The fight was bloody on both sides. Lyon's leader counter is removed from the Map. The Union side will need to look to bring a further leader across to the Trans-Mississippi if there are to retain any initiative.

I am not sure if I have played the morale and exhaustion rules correctly but I applied them the same for Bothe sides and in any event the confederates failed dice rolls whereas the Union weathered them. The battle could have gone either way. The higher morale of the smaller Union force helped to defeat a slightly larger force. I will check the rules again before I play next time however interestingly I thought I would have a slight Confederate bias in my dealings given my lifetimes gentle immersion in confederate mythology- the truth is I didn't want either side to lose having spent all the hours required to paint them. Too much was at stake in this opening battle in terms of the momentum of events. It was a small interesting battle and got me used to the ebb and flow of the rules and some of the key concepts. 

If I take anything away it is that being stationary is a very good thing in terms of fire power. Again - don't attach leaders who are needed as counters for movement on the campaign Map to firefights ! 

Recovery 

The recovery rules are quite harsh where one side is forced to leave the field of battle without a rearguard under the V&B ACW campaign rules.  There is a lot to be said for withdrawing in good order. A "Rearguard" needs to be an intact battlefield command and neither routed or exhausted. The confederate side cannot recover artillery losses and will then lose all of its artillery pieces abandoned in the field. This feels right. Guibor's Missouri State Guard Artillery is lost as an inherent component of the Militia counter for now. I will need a mechanism for refitting artillery units. The cavalry and infantry will recover 1/3 of their losses only as the wounded are left behind to be captured. I can cross that artillery bridge when I come to re-fight with Price. There is perhaps something about a division being in a department or receiving reinforcements from a department to refresh its artillery. Guns were captured and lost on the battlefield and re-purposed all of the time. For now Price is without his guns as he retreats toward Springfield. 

6 of 8 infantry strength points were lost so the confederate infantry will recover 2 strength points to make 4 in V&B terms. The M4 Militia counter on the WBTS map should be replaced with an M2 which will consolidate as Weightman's Missouri State Guard (1st-4th) M4 PT NE. 

1 of the 3 lost cavalry strength points will be recovered so 2 from 4 will remain and the C2 counter on the map will be flipped for a C1 counter.  Rives base will be lost altogether or its remnants "consolidated" and Cawthorn's State Guard Cavalry brigade (and Missouri Cavalry regiments) will become a single 2-5 PT base. When it is reinforced it can be split out in terms of its components.  Where possible multiple single point cavalry stands or 2 point infantry stands within counters should not exist and should always be consolidated. This feels historical with the remnants of battalions or squadrons being thrown in together locally. The counters at their higher points values are divisions but at the lower points (1 or 2 especially) they would represent normal size infantry battalions let alone small brigades. 

On the Union side fully 75 % of casualties will be recovered as they both won and retained the battlefield. 3 of 4 lost infantry strength points will recover. On that basis the counter can remain the same but there will be a single  5-5 consolidated base under Sigel for now representing the 1st US infantry, some companies of the US 2nd infantry  and the 1 st, 3d and 5th Missouri infantry.  I modelled the I3 division counter as a two on tabletop 3-5 brigades initially rather than a single full strength 6-5 "Death Star" stand. With 5 tabletop strength points remaining but only 2.5 map points it does not feel right to model as a division with two stands with 2 (a linear stand ?) and 3 points respectively. A 5 strength stand now seems correct which is a brigade of 2,500 men. 

Totten's artillery counter is retained and had no losses. As a makeweight to the infantry situation I will recover 1 of 2 lost union cavalry strength points only rather than "rounding up" and retain a C1 counter but on the tabletop it will be a much reduced  brigade which can operate as a skirmish cavalry stand only. and dismounted as a skirmish sized infantry base.  So Sturgis' brigade is now 1-5 (s) as a tabletop stand representing somewhere around 500 troopers. 

Promotions

The general rule for the battlefield is that 3 victorious divisions for the victor should receive a promotion and 1 for the loser. I think I will model something a little more granular going foward for smaller battles. 

Price' Green division could be promoted to Veteran under normal rules to promote a single losing division but as the infantry are militia they cannot progress beyond "green" under my current home brew of the promotion rules. They will not receive a morale upgrade to 5. The is one of my key concepts for the Boardgame and Volley and Bayonet arena of the campaign. I have to retain an incentive to develop militia counters into properly trained infantry going forward. Under my system Militia counters always retain their PT status even after 6 months. I do not consider that without a charge or being charged with a melee during the battle that they should lose the "No Elite" status either (I could remove that as a discretion for some militia if they perform stunningly well but it is better not to). As a compromise I will however "drag" experience with any Militia unit into any augmentation as an infantry counter to represent the experienced core of the unit.  

As Lyon's command was already veteran it can choose a stand to promote to "Crack". Its morale will increase to 6 and the exhaustion level for the whole counter will be set at 60 %. So Sigel's Missouri brigade will be 5-6. This seems a little strange but the rating of the majority unit would be used (Sigel) when the two infantry stands consolidate. A 2 strength point linear stand is not really allowed if avoidable so Andrews brigade must consolidate. We are not switching units between counters so the integrity of the "division" is not being upset.  This seems fair - the Union persisted with a victory after a couple of rounds whilst losing their overall commander and becoming exhausted. To get from Veteran to Elite for a stand in a division this is the test. They persevered to victory. Essentially the counter on the map is a 2.5 strong brigade which models as a 6-5 crack unit on the battlefield. Any augmentation of the counter can add new brigades so that the division will operate as a "mixed" experience/morale  unit but with a 6 "crack" or "shock" brigade. The overall exhaustion level for the division should however be 60 % unless that becomes a nonsense in which case I can model the division's exhaustion on a more granular level if it gets too big. 

I don't think the battle is large enough to contribute to victory points. 

All that remains is for me to update the tracker for the two commands position and any known components. I will then move to phase 2 of Turn 7 1861 with the initiative chit draw. 

Conclusions

I am sure that I made some mistakes around the effect of Lyon being killed and the effect on the Division of permanently being out of command. I love the rules and the way that the attrition of casualties feeds through to the concept of exhaustion. Rather than simply removing a whole division at once from the battlefield an even fight between divisions then becomes balanced on knife edge. I am also really happy that the post battlefield promotion process will reward a unit in a division which  has suffered that baptism of fire. 

The elite "Black Hats" who fought in the Eastern theatre for much of the war were made up I believe of regiments from Iowa and Wisconsin. Now that the Union has a "crack" brigade which includes elements of regular army battalions and various Missouri regiments I will order and paint up a brigade with regular  "Black Hats" from Pendraken to celebrate their battlefield promotion on the field of Rolla. This is the stuff of notoriety and battlefield legend that I was hoping for when I opted to go in at the deep end with a campaign.

The decision or limitation on the part of the the union to send in a smaller force comprising of just a regular infantry division and an attached regular cavalry brigade gave the union a stiffer line. While the confederates outnumbered the Union 3:2 on the battlefield rolling against a base morale point of 4 rather than 5 made their elements twice as likely to disorder. This led to less effective fire. Both sides reached their exhaustion threshold in the same turn but luckily the Union had become stationary prior to this and inflicted a large number of casualties in a single turn leading to a collapse in morale throughout the small confederate force. For a simple system it delivered a lot of nuance - I found myself wishing for fresh confederate troops to throw into the fight.

The newly built and painted red Rolla courthouse will as in real life now be used as a Union hospital and supply station to support this new staging post for the union forces in Missouri. Do the confederates regroup and hit them back ? Or will the Union consolidate its forces in Missouri and press on to seek a final and early large battle in the Trans-Mississippi such as a "Pea Ridge". I love the way that a campaign begins in effect to tell a story.


Thursday, 12 October 2023

Confederate Dismounted Cavalry and Artillery


A part of me wants to just crack on with my first battle of Rolla but another annoying perfectionist voice is telling me that I have waited 45 years or so as a Toy Soldier player to launch a project this big so why not get all of the bits and pieces in place first. One of the hold-ups has been a system for dismounted cavalry. I cracked this relatively recently. A "Light Cavalry" base with more than 2 points will dismount as a Linear infantry base which can be populated using my tray system by 2 x 30 mm square bases. Each of those single 30 mm square bases can be used as the dismounted "skirmish" base produced by a 1 point mounted Volley and Bayonet ACW cavalry base. As there are 6 cavalry figures for a single point mounted cavalry base I have tried to replicate on each dismounted base with at least 5 figures including a horse holder with two horses and a standard bearer and troopers. 

I have noted that the Volley and Bayonet rules allow basing for figures less than 15 mm for artillery on 1.5 inch squares (rather than having to produce the 3 inch depth). This looks better but I will use a deeper base when the artillery is limbered. You can see above my first confederate smooth bore artillery piece representing a small battery. The buildings on the left of the picture are my first attempt at a 3 inch x 2 inch "village" base. I have left space in each corner for a 30 mm (my 1.5 inch square) cavalry skirmish base. All of my built scenery is at 6 mm scale and this seems to be working well with 10 mm figures. Red Vector make a good mdf 6 mm fence section with a base which when quickly painted and flocked comes up well. I have invested in a lot of stuff from Timecast as well including the latest rubber fields. These come up really well with a good coat of cheap Burnt Umber from the hobby store and and some Javis field scatter. I am starting to get the look I want. 


The Union forces at Rolla include elements from the 1st and 2nd US cavalry these troopers made the leap to the tabletop last week before I set off on a short holiday. I will need a couple of dismounted bases as well for these guys.


S&A scenics are providing the real background for my tabletop in terms of roads, streams, hills and good set of trees to get me going. I have heard that any civil war battlefield should just be over populated with trees so I will set to work with that. I have painted up a model  Appomattox court house model bright red in homage to the original Rolla court house on my battlefield.

Elements left to complete include at least two bases for limbered artillery, a couple of leadership bases and probably one more Union massed infantry base. The Union forces at Rolla are a single 3 point map counter in the War Between the States Game (c. 3,000 bayonets) which could either represent on Volley and Bayonet tabletop as two massed 3 point brigade bases or a single full strength 6 point brigade base. I think the latter is a better representation for the union forces. Smaller contingents for this small initial battle. On the scenery front I am now almost there. Trees, trees and more trees and a couple more village enclosures. I could do with quite a few more fence sections as well although I note that fences were much rarer in the Western theatre than in the East so I won't beat myself up if every road is not lined with fences. 

See you in Hell Bill Yank ! See you in Hell Johnny Reb ! 


Monday, 11 September 2023

Building Rolla


I took delivery of a nice package of terrain from S&A scenics  this morning. Essentially a tester purchase of roads, rivers, trees and hills. Some absolute basics. I am really pleased and I have put in another bumper order so that I can populate fairly decent tables up to perhaps 12' x 6'. The roads in particular are great and reasonably priced. Felt on one side which is rubberised and textured and painted.  


It was very hard not to have a "play" and to march Price's Missouri State Guard through the town and off down the Jamestown  Road. I found a German website which has paper models of a town in 6mm/N scale for the locals to download and make for Xmas. The school can double as a Court house for now and there are a bunch of wooden farm buildings that look the part. The CourtHouse in Rolla was of course red - I am considering getting my pencils out. 


The narrow river kit is also really well made - all backed on MDF and it comes painted in sensible sections. The mat is a nice fleece from Geek Villain. I want to get more but they are currently sold out.  I have worked out what else I need to buy to complete the Rolla map. I am setting a deadline now for fighting the first battle I think as soon as the final terrain arrives which might be 3-4 weeks. 


The confederate cavalry is complete and just needs the bases flocking. I then need the Union cavalry and dismounted troopers for both sides and a couple of artillery pieces. Perhaps another 1-2 weeks work in total. I am due to take a "break" - seems odd calling it that as I am retired. I am going up to Northumberland for big beaches and landscapes - Berwick on Tweed, Bamburgh and the Farne isles etc. I am tempted to pack my stuff but I very much doubt I will get away with that. I could take some paints and a brigade or two to fill the evenings. 

Monday, 4 September 2023

Plotting Rolla


Above : Google Image Rolla 

I couldn't sleep last night which was annoying so I got up about 4 am and decided to create my battlefield for Rolla. The screenshot of the local area above has been tipped on its side so that the top of the Photo is East. The large woodlands of the Mark Twain Forest are to the East also and the Ozarks wilderness and lake area broadly to the South East. 

There is a lot you can work out from maps and  satellite photos  on google. I have already established that Rolla was a  quite a small town in 1861. It still is - population c. 20,000 today. The Court House was roofed but unfinished  in 1861 which is presumably why the Union were able to use it as warehouse and hospital during the early part of the war. There are a handful of heritage buildings in Rolla but apart from the courthouse it would appear wooden built. Main Street is barely 200 m long and there are a few other gridded roads from old photos. It is wonderful bringing an old place back to life.  

The picture below is the town in 1860. Maybe a handful of  two story buildings only. A hotel and one or two grander houses and stores in town. Towards the edge of town just simple single story two or three room wooden houses.  There is probably some warehousing and facilities for the railroad terminus in the photo (the railroad planned to reach San Francisco from St.Louis ended here in 1861). 

Above : Historic Photo of City of Rolla (see footer) 

I don't think the town will need more than one Volley and Bayonet 6 inch x 4 inch template (An area 600 m x 400 m in ground scale). I have found a few more pictures of heritage buildings on public sites online. The courthouse : -


An old wooden schoolhouse :- 


And the County Jail block from the early Nineteenth century :-  


The road plan reveals an "Old St. James Road" leading on to St. Louis. From the map I have been able to find other old roads leading at different points of the compass to the nearby locations of Vichy, Salem and to Yancy Mills. The area is much more wooded than I expected with numbers of watercourses. It's possible that these might be seasonal given one of the names - "Little Dry Creek". I have been able to place some high ground to the North and West of the town, probably from where the photo above might have been taken. There are some tree lines  along the old watercourses and a few farms. Out come the coloured pencils and some common sense and can think back to this roughly 3 mile x 2 mile or 6 x 4 foot table for Rolla in 1861. 

The names of the tributary streams display the part German heritage of the town - "Franz Branch" and "Burgher Branch" e.g.  The aerial photo shows that the irrigated sections that are not hilly or wooded are densely marked out with square land claim plots. This original land claim parcelling is thrown forward into the more recent land use. So for example a local golf is crammed entirely into a  square plot that must have been bought originally as farmland. The same holds true for housing developments that fit to the square "claims" pattern out into the farmland surrounding the historic town. You just don't get that grid pattern of land use in the UK. In the US it is is extended into the farmland itself. 

The areas that are white on my "original" plan will randomly be carpet bombed with some square fields and a few square orchards or "wood lots". to show the land usage.  As the battle will take place in July some of the fields can hold crops which will behave appropriately under the Volley and Bayonet rules - blocking line of site until trampled by massed stands.  The streams whilst perhaps dry(ish) can operate as fordable streams for the purpose of the rules. They will cost half a movement to cross and where lines with a thicker area pf wood may affect visibility/ 

This will do - The Confederates line of communication will leave the map ay the middle bottom (West) toward Jefferson City and the Union troops from the East along the St. James/St.Louis road. I will post again when the two forces are complete and on my newly dressed tabletop. I am tossing up whether to build a small scratch built red courthouse from card. It does seem appropriate. I have opted for 6 mm scenery with my 10 mm figures and a lot of scenery and "dressing" is in the post. My cavalry are coming on in fits and starts so it may be a week before I can roll a dice in anger. 

Until then See you in hell Billy Yank ! See you in hell Johnny Reb ! 


Thursday, 24 August 2023

Preserved Starting Position July 1861


This Page is the starting position and type of all map units and other important information for both sides. It includes a summary of blockades, political points and developments, supply and personnel points and for each "on map" counter what they "contain" for the tabletop Volley and Bayonet brigade bases which will fight our battles. The Order of Battle is extended to include the factored in artillery. I have also listed all fortifications and how these will translate to the tabletop. 

I will  regularly produce an update and post to the top of the site as the "Living Order of Battle". 

Map Key 

A/B/C 1234 Map number and coordinate for unit grouping on War Between the States map (A is the West Theatre North map - B is the West South map including the Gulf coast from North West Florida to Galveston in Texas. I will include names of places on the map - confederate cities which attract supply points will be in bold and names in italics will be confederate sea ports. Supply points provided by cities and ports vary by month e.g. by season/harvest time. New Orleans, Richmond, Nashville, Memphis and Atlanta are major supply cities and increase in supply provision annually. 

Counter Key

Counters in War Between the States are in strength points that represent c. 1,000 men. Volley and Bayonet units/bases have strength points for each 500 men. 

I# Infantry counter and strength, C# Cavalry counter and strength, M# Militia counter and strength G# Garrison counter and strength, HQ Corps HQ, FA# Field Army and Supply Name***(#-#-#) Leader with Star Rating and Statistics (Initiative, Combat Span (****/***** only), Combat Value for Morale), RT River Transport, RF River Flotilla RI Iron Clad NT Naval Transport NF Naval Flotilla, SG Siege Gun, X2 Fort, X3 Fortress, ST# Supply Train and Supply (up to 10 points) DepName# Department and supply e.g. DepMiddle, Depot#/# Depot counter number and Supply (up to 99 points) 

Volley and Bayonet Bases "contained" within the counters at each location are described and using standard notation some examples 6-4  PT/NE DG (a 6 point green infantry base with dedicated artillery with morale 4 operating at 40 % exhaustion within a unit - the no elites designation is lost when promoted but the PT poorly trained designation remains for six months following recruitment), 4-5 (a veteran  brigade stand with morale 5 operating at 50 % exhaustion within a unit, Cav 2-4 PT (a two point green cavalry brigade stand), 2-5 SB-F PT (smoothbore field piece (probably a 12 lb Napoleon) newly recruited) and so on. 

Artillery is assigned to beginning/new units in sensible types and amounts based on the standard V&B Corps and those listed in the House Divided campaign order of battle. That Order of battle details some variations in units from the outset so some regular US units in Western union formations and a stiffer brigade in the confederate Army of the Shenandoah. Each division of 6-9 counter points (12-18 base points) will be assigned initial artillery and forces with multiple divisions and an on map HQ function may also receive Corps artillery as per standard V&B ACW corps by year and upgrades and promotions will occur/can be awarded  quarterly 3 March/6 June/9 September/13 December in accordance with the House Divided campaign rules. 

Finally for tabletop command and control purposes only I may include on an ad hoc basis one or two divisional leaders as appropriate for forces approaching divisional strength or more (c. 6/7,000 men - 6 counter points - 12 base points) where a counter commander is not present but for basic game purposes only. 

Fortifications X2, X3 special cases for Richmond, Virginia and Vicksburg

The War Between the States campaign rules allow a free upgrade of any x2 counter built in Washington or Richmond to a x3 fortress. Rather than have a chance role for the placement of fort (this seems silly when both capitals were fortified from the get go as a strategic imperative)  from July 1861 and with an expenditure of 30 supply points (the average cost for fort placement) both sides can place a fort counter. Washington and Richmond will then commence fortifications/works and siege artillery which translate to the tabletop in accordance with the schedule in the House Divided campaign rules. By 13/61 the counters will be upgraded to fortress counters to designate the advanced state of the works and artillery. I will keep a running tally in the Order of Battle of the State of those fortifications. 

In addition the confederate side has designated Vicksburg as "fortress Mississippi" and at no additional cost it will follow the schedule of fortifications and siege artillery from 8/61 in the House Divided Campaign rules up until 9/61 and receive a x2 counter. On payment of 50 supply points from turn 10 in full or across a number of turns (a below average cost of a fortress purchase attempt) Vicksburg will upgrade to a fortress and will continue to follow the "fortress Mississippi" fortification and siege artillery schedule. 

Fort Monroe  C3118  begins with an X3 counter on the map and and begins the game with 48 " (6" per side of "fort" sections under the Volley and Bayonet rules and 2 brigades of 2-5 SG-SB artillery. As a fortress in the War Between the States Rules can take up to 100 strength points of counters I think the suggested 24 " (6 " per side) is a little small. Equally for a fort to take ten points of counters (perhaps 5 bases at 4 strength points and 2 brigades of siege artillery and it the counters divisional artillery) it will need probably 12 " on each side initially. 

All other existing or built forts X2 counters (e.g. Memphis, Charleston) will have or create 24 " of field works and 2 SG-SB Artillery in two instalments (i.e complete after a quarter). Any newly built X3 counter will have the works upgraded to "Fort" sections in two instalments (i.e complete after a quarter) with 2 additional SG-R artillery brigades. X2 and X3 counters other than those in the campaign set up and Washington, Richmond and Vicksburg will be subject to payment costs in the War Between the States rules but I may dispense with the  "chance" rolls for placement. I am not sure I like the chance roll ? Surely if a side expends the resources it should be able to complete the works. Throwing away say 200 supply points for the confederacy because a 1 in 6 die roll fails to construct a fortress doesn't seem fair. I will probably just allow a build on the payment of the above average chance cost payment (1-4 on D6) - 40 for a fort and then 120 for a fortress. That seems sufficiently expensive for the confederacy to "dig in". Sieges generally were lost in each instance 

Beginning Strategic Turn July 1861 - Blockades - Supply 

B4026 Pensacola and C3119 Norfolk are blockaded due to union occupation of B4027 Fort Pickens and C3118 Fort Monroe respectively.


Union General Supply begins at 350 and increases by 150 to 500 for 7/61. Union receives 100 Personnel points for 7/61 Initial Call (use it or lose it this turn)

Confederate General Supply begins at 200. Supply from Richmond (10), Nashville (10), Memphis (5), Atlanta (5) and New Orleans (10), City Supply is at 0 for 7/61 and Import Supply at 1 (Brashear, New Orleans PortProctorsvilleCharlestonGalveston, Sabine City, Mobile, Savannah, Brunswick, Wilmington, Newbern, Morehead City and Jacksonville not blockaded - 13 points). Increase by 53 to 253. Confederates receive 80 Personnel points for 7/61 Initial Call (use it or lose it this turn). 

Political Points/Victory Conditions/Neutrality etc. 

Confederate  0 - Union 0 

No Victory/Political Appeals by either side 

(1) Kentucky Neutral

(2) Missouri Neutral 

(3) No Foreign Intervention

(4) No Emancipation Proclamation

(5) Neither side Occupies any Cities (Variant Political Rules 29.11/29.12) or the union the Lead and Salt Mines (Saltville/C0819) 

(6) Union has not cleared Mississippi

(7) Union has not cut Virginia/Tennessee Rail Link

(8) No combat points for either side and no destroyed or captured Forts

(9) No Paroles of Leaders

(10) No additional Volunteer Calls or Drafts 

Confederate Order of Battle 

Gulf Coast/Mississipi

B0153 Galveston M3 (6-4 PT NE

B2732 X2 (48 " field works and 2 x 2-5 SG-SB)

B2628 New Orleans G1, RT (2-4 PT NE) 

B3627 Fort Morgan, X2,  G1 (2-4 PT NE, 48 " field works and 2 x 2-5 SG-SB)

B4026 Pensacola (blockaded by Fort Pickens) M2 (4-4 PT NE) 

B3625 Mobile M2 (4-4 PT NE) 

B2317 Vicksburg Fortifications Projects (see above)

Trans Mississipi

B1705 Little Rock, DepTransMi, ST3, M3, M3 (2x 6-4 PT NE, 2-5 SB-F PT or add DG to each base and have a divisional battery 1-5 SB-F PT 

A2014 Rolla, Price***2-1, C2, M4 (2 x 4-4 PT NE, 2 x Cav 2-5 PT, 2-5 SB-F PT)

Tennessee

B2802 Memphis, Polk***2-1, DepKen/Tenn, X2, ST2, I3, I3 C2, RT (2 x 6-4 PT NE, 2 x Cav 2-5 PT, 2-5 SB-H PT, 48 " Fieldworks 2 x 2-5 SG-SB) 

B4026 NashvilleM2 (4-4 PT NE) 

B3021 New Madrid, M2 (4-4 PT NE) 

Atlantic Coast/Carolinas 

C1145 Fort Pulaski, x2, G1 (2-4 PT NE, 48 " field works and 2 x 2-5 SG-SB)

C1641 Fort Sumter, x2, G1, I3, I3 (2-4 PT NE, 2 x 6-4 PT NE, 2-5 SB-F PT, 48 " field works and 2 x 2-5 SG-SB)

C1640 Charleston, DepSCarol/Ga/Fla, 2 supply points 

C3527 Fort Hatteras & Clerk (Not made), G1 (2-4 PT NE)

C2024 RaleighDepSVirginia/NCarol, I3 (6-4 PT NE) 

Virginia

C1609 M2 (4-4 PT NE)

C1612 M2 (4-4 PT NE)

C2108 Winchester, J.Johnston****3-3-1I3, I3,I2,I2, (Jackson "Stonewall" Brigade 6-5, 6-4 PT NE, 4-4 PT NE, 4-4 PT NE, 2-5 SH-H PT) (I have swapped out an I4 and an I2 for 2 x I3's from the campaign set up in the Boardgame to accommodate the high morale 6-5 first stonewall brigade) 

C2409 Manassas Junction, Beauregard****3-3-1, 1stCorpsHQ, ST4, C1, I4, I3, I3, I2, I2, I2, I2, I2 (Stuart  Cavalry 2-5,  2 x 4-4 PT NE (I4), 2 x 6-4 PT NE (I3's) 5 x 4-4 PT NE (I2's), Corps Artillery 2-5 R-F , Divisional Artillery 2-5 SB-F PT, 2-5 SB-H PT

C4119 Norfolk (Blockaded) M4 (2 x 4-4 PT NE) 

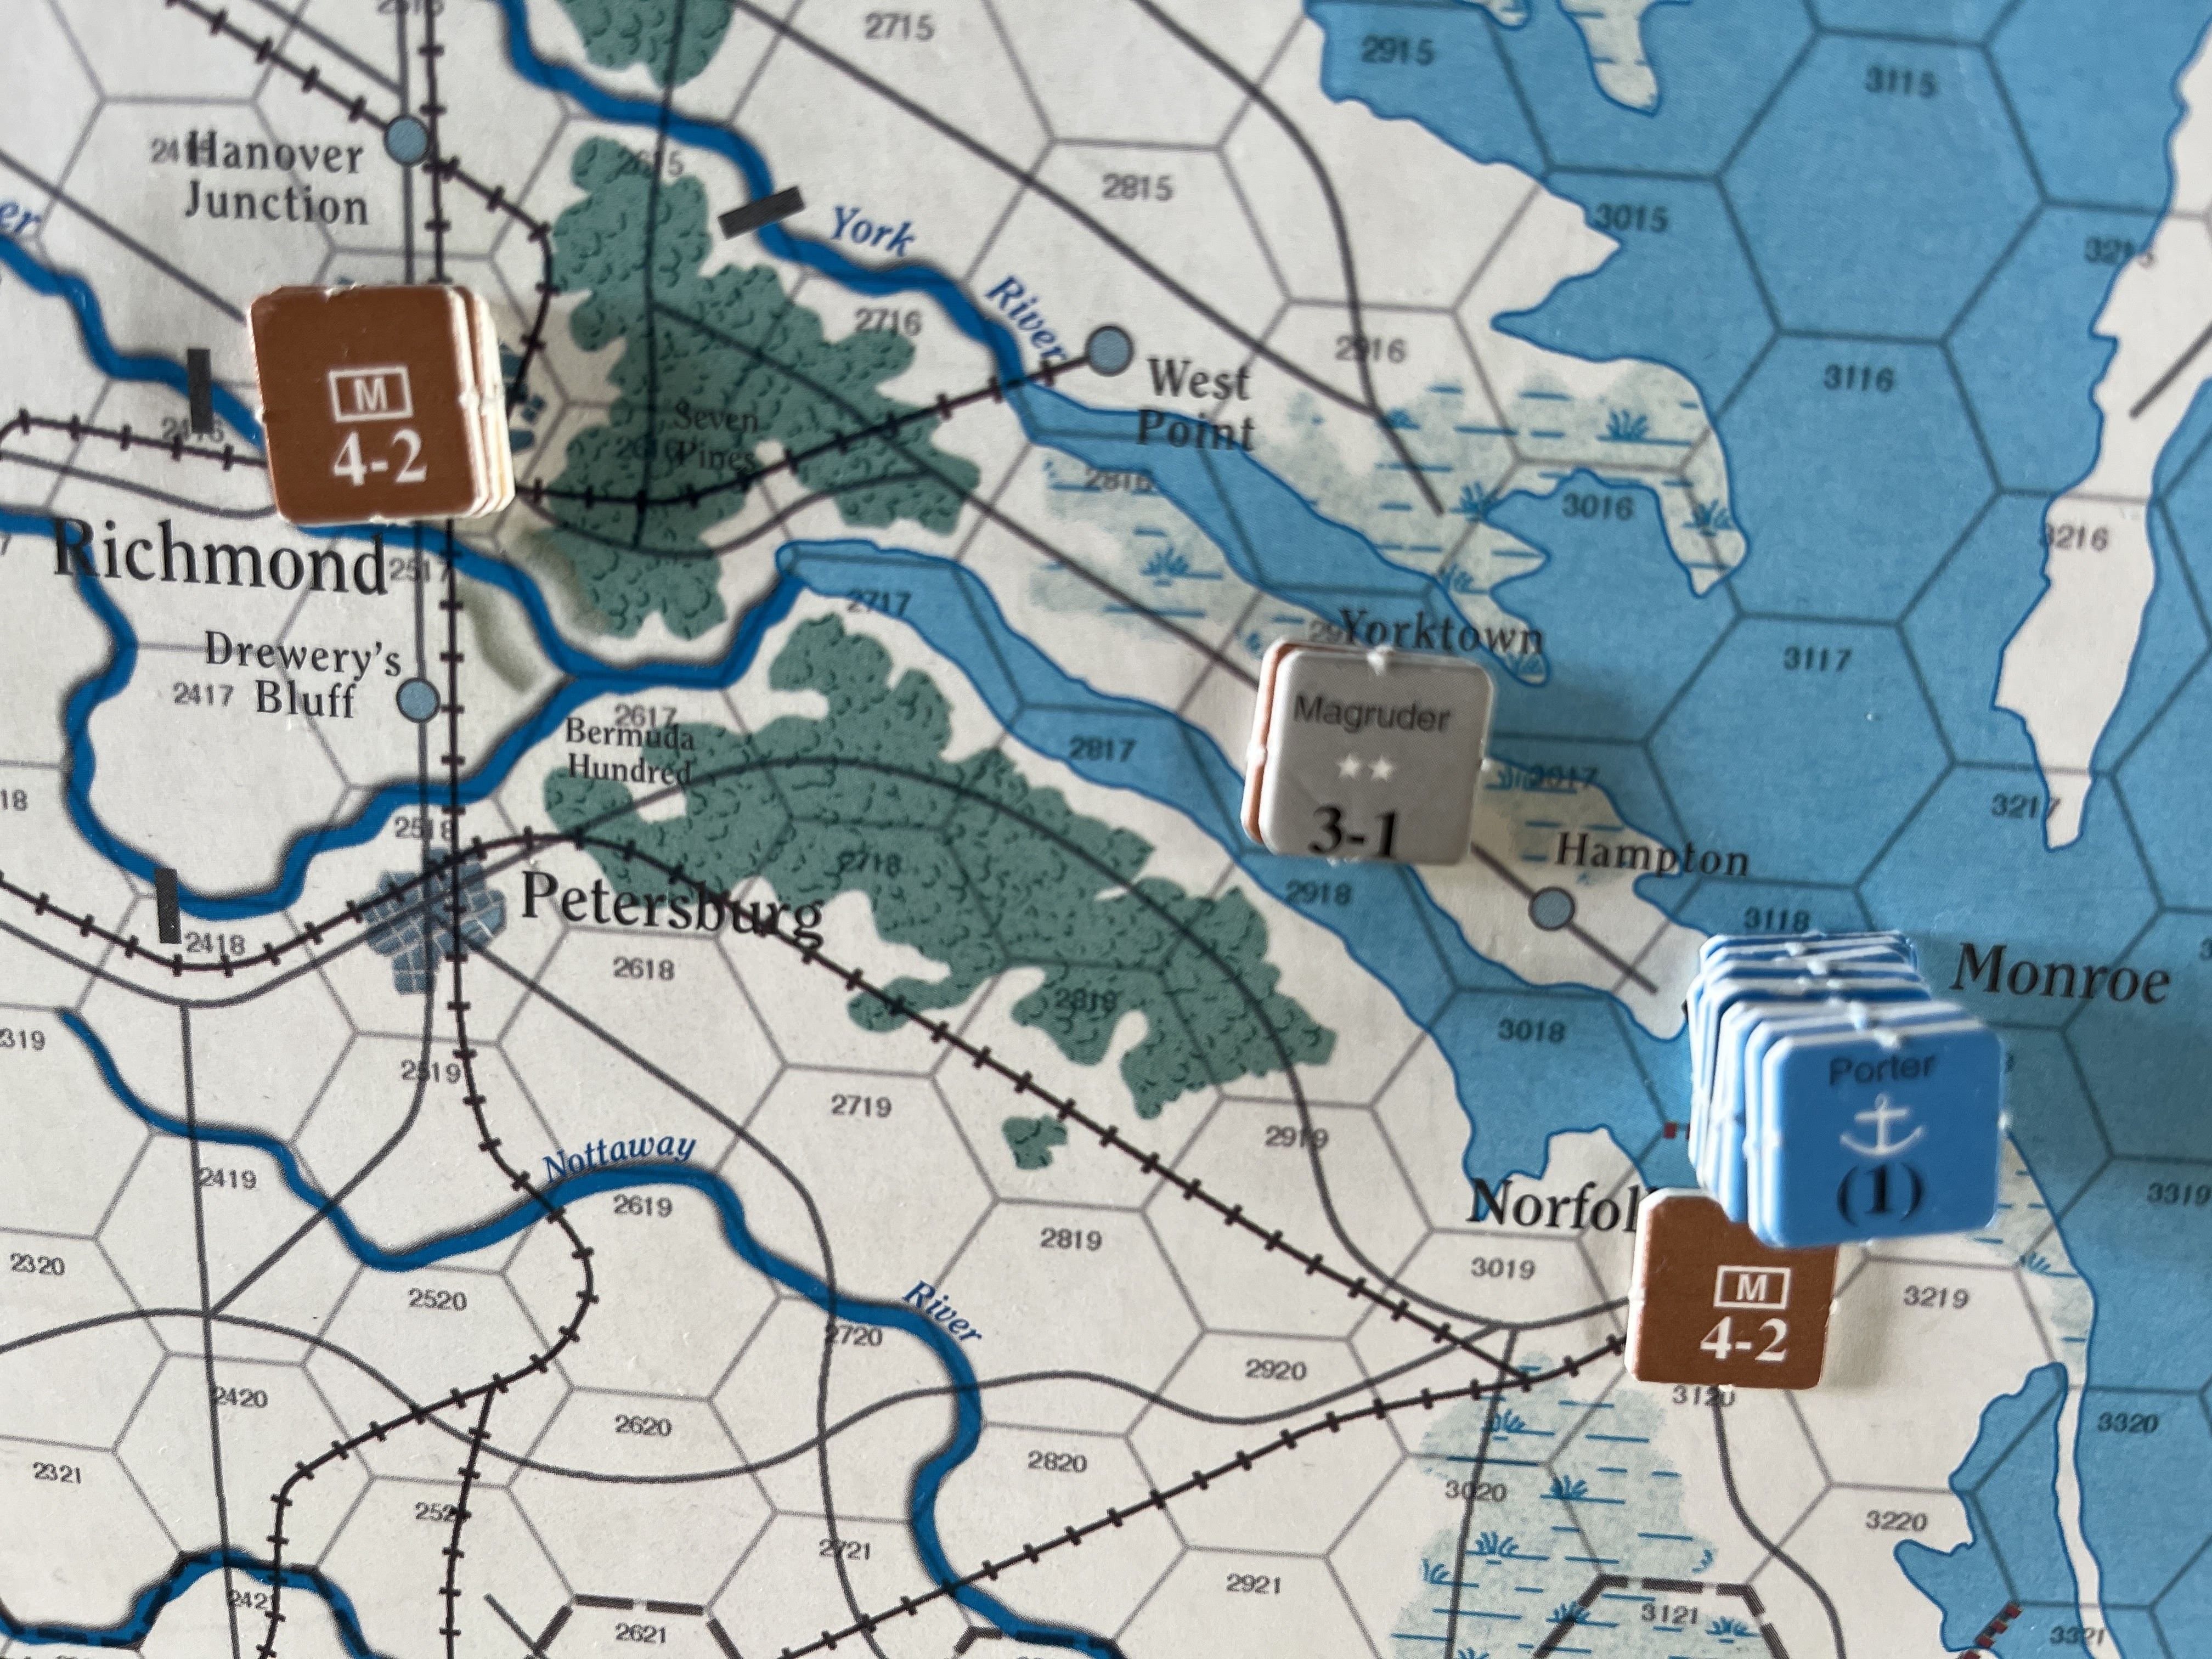
C2108 Yorktown Magruder**3-1, I4 (2 x 4-4 PT NE, with Norfolk notionally 2-5 SB-F PT) 

C2516 Richmond DepNorthVirginia, Fortifications Projects (see above), M4, M4 (4 x 4-4 PT NE, 2-5 SB-F PT) 

C2512 Aqua Creek M4  (2 x 4-4 PT NE) 

Confederate Production Spiral 

Completing :-

7/61 8 Militia Strength Points

8/61 15 Garrison Strength Points

9/61 15 Infantry Points, 6 Cavalry Strength Points 

10/61 1 River Flotilla 


Rail Transport Points 

7/61 - 10 Cap 


Union Order of Battle 

Gulf Coast 

B4017 Fort Pickens (Blockading Pensacola), M1, X2 (2-4 PT NE, 48" Field Works, 2 x 2-5 SG-SB)

Missouri  

A2712 St. Louis, Lyons**4-2DepMissouri, I3, C1, M4, M4, M4, RT, ST2 (6-5 (2nd US Infantry Regiment), 6 x 4-4 PT NE, Cavalry 2-5 (US Regular Cavalry), 2-5 SB-H PT, 2-5 SB-F PT) - The V&B campaign game gives the Union side 12 base points of regulars at the outset as  3 x 4-5 bases. I am going to give the Union side 2 x 6-5 bases and place one of these in the East and one in the West initially which accords with my understanding as to where the regulars were by July 1861. 

A1811 I3 Jefferson City (6-4 PT NE)

Ohio 

A5309 Cincinatti, McClellan*****1-5-2, DepOhio, M2, RT, ST2 (4-4 PT NE)

A3005 Springfield, M3, M3 (2x 6-4 PT NE, 2-5 SB-F PT) 

A6004 Columbus, M3, M3 (2 x 6-4 PT NE 2-5 SB-H PT) 

A4506 Indianapolis, M3, M3, M2 (2 x 6-4 PT NE, 4-4 PT NE, 2-5 SB-F PT)

Virginia/Middle 

C0612 Charleston (West Virginia), I4 (2 x 4-4 PT NE, 2-5 SB-H PT together with next) 

C1311, I4 (2x 4-4 PT NE)

C2206 Harpers Ferry, I6, I6 (Bank's Command) (4 x 6-4 PT NE, 2-5 SB-F PT, 2-5 SB-H PT) 

C2608 Washington DC, McDowell***2-0, 1stCorpsHQ, I9, I6, I6, I3, M4, G1, ST6, Fortifications Project (see above) (6-5 (I3 - 1 st US Infantry), 3 x 6-4 PT NE, 2 x 6-4 PT NE, 2 x 6-4 PT NE, 2 x 4-4 PT NE, 2-5 PT NE, Corps Artillery 2-5 R-F, Divisional Artillery 2-5 SB-H, 2-5 SB-F  PT. Again "F" can be spread out as DG attributes to bases at the cost of 1 artillery point per 2 bases. 


C2609 Alexandria, I5 (6-4 PT NE, 4-4 PT NE) 

C2806 Baltimore, DepMiddle,  I1, M4, NT (2-5 PT NE, 2 x 4-4 PT NE) 

C2601 Harrisburg, M2, M2 (2 x 4-4 PT NE)

C3401 Philadelphia, DepEast, I1 (2-4 PT NE) 

C3118 Fort Monroe, Butler****0-4-0, Porter(1)(Naval Leader),  x3 (specialist works - see above), M3, M3, M3, G2, Supply Points 2, NF, NF (48 " Fort works (12" each side), 2 x 2-5 SG-SB), 3 x 6-4 PT NE, 4-4 PT NE)


Union Production Spiral 

Completing;

7/61 10 Militia Strength Points

8/61 20 Garrison Strength Points 

9/61 20 Infantry Strength Points, 1 River Flotilla 

10/61 5 Cavalry Strength Points, 1 Naval Flotilla 


Rail Transport Points 

7/61 - 25 Cap 

Next Step - Run Strategic Cycle for each side for 7/1861. 


Reworked Order of Battle for Union Forces First Mannassas

Above :Union Infantryman (US public domain image)  I have completed the Fire and Fury OOB for the confederates using the more detailed stand...