Saturday 6 April 2024

Confederate Order of Battle for the Campaign First Manassas


I have not managed to post at all on this website since before Xmas. Life has got away from me a little bit with my parents who are unwell and family. 

I hopefully have some blue water for a few months and can refocus on this project. The "state of play" is that it is turn 1 of August 186. I am off on holiday to Mull with my wife and a few friends in the first week of May. A great target would be to get the first big battle done by then or have it read to be completed on my return. 

I have now purchased 6 of the cheap plastic fold down tables. I do have a silver wedding anniversary next year coming up so hopefully they won't go to waste as bars or buffet tables if we had some sort of celebration here. Another huge order of roads, creeks and hills from my basic scenery supplier of choice S&S in the UK have arrived. They are superb and will do me a lifetime at all scales up to 15 mmm. I have also purchased a large amount of foam board for creating contours under my printed terrain cloths. 


I have started to plan out the roads and main creek from a number of resources. On the above photo Henry House Hill is the small hill in the in the rectangle of roads on the left hand edge of the table. 


I have had one supplier disappointment. Geek Gaming Mats printing machine broke (according to their website and information) and once it was replaced I made the exact same order of two more  "Autumn" fleece 6 x 4 mats so that I could make a huge 12 x 6 foot table. Unfortunately the new prints are coming up a different tone as you can see in the above picture. It's not terrible I know but I can see it and and it is offending my OCD ! I am investing in kit for a retirement of gaming but I don't have bottomless resources. It will be fine once the whole table is "dressed". If I add a little but more to the look each time over time and continue to paint my bases I should be able to create some wonderful Civil War "soldier porn" of legendary Scott Mingus proportions ! 

In a week or so I shall attempt the first "build" on the table. 

Confederate Order of Battle 

The Confederates  at the historic battle were comprised of two "armies" which were made up in effect of single Corps sized components. By the 21 July 1861  the Army of the Shenandoah under Jo Johnston had managed to slip away from the Union forces and move across by rail to Manassas Johnston Junction. This was occurring from about 3 days before the battle with the final forces arriving as the battle was occurring. Famously Jackson arrived at Henry House Hill as General Bee's brigade was falling out. They rallied behind Jackson and the Virginians "standing like a Stone Wall" and the tide was turned. 

In my campaign Jo Johnston has been at Manassas Junction since the second week of July. Jo Johnston was the senior general and will take overall command of the forces on the day. I will allow however Beauregard also to act as a "corps" commander (without an HQ up to his counter command span 3). Like the Federals I will model each division counter as 2 or 3 "named" brigades and list the regiments as appropriate and provide each division with a divisional commander. 

The main difference I can see in the starting Corps permitted by the V&Bayonet campaign rules for the early war is that confederate Corps have a small cavalry reserve whereas Union corps have a small corps artillery brigade as a reserve (usually rifled pieces so parrot guns). Cavalry is modelled from counters in my campaign as separate purchases under the War Between the States boardame rules. My union Order of battle has provided them with 5 brigades of artillery (roughly ten batteries). I don't believe that the Confederates had less artillery per se. The difference in the model corps in the V&B campaign reflects the greater preponderance of Confederate cavalry which is already a "thing" in my game with the cheaper confederate cavalry points. I think I will allow confederate HQ's (only) not leaders) an artillery reserve but limit this to a SB-H PT brigade rather than rifled field artillery at this stage of the war. I am not purchasing artillery for the boardgame moves so I just have to come up with something fair and representative. Overall union artillery was superior in numbers and effectiveness in the war as a whole as I understand it (in terms of "kit" and quality of ordanance until large amounts of Union material was captured  rather than bypass way of morale of the crews or training) so that would seem realistic. 

Army of the Potomac & Army of the Shenandoah (operates as two small Corps on the tabletop) 

The big line from the Order of Battle and Unit Tracker for Manassas reads as follows. As the counters are not marked "0" against their PT status they have all clicked up to "1" in their time based progress from Green to Veteran status :-

C2409 Manassas Junction, Beauregard****3-3-1, Depot 6-6, 1stCorpsHQ, ST4, C1 (Stuart  Cavalry 2-5) I6 (3 x 4-4 PT NE) I7 (2 x 5-4 PT NE, 4-4 PT NE), I5 (4-4 PT NE, 2 x 3-4 PT NE), Corps Artillery 2-5 R-F , Divisional Artillery 2-5 SB-F PT, 2-5 SB-H PT and J.Johnston****3-3-1I5 (4-4 PT NE, 2 x 3-4 PT NE) I5 (Stonewall), (Jackson "Stonewall" Brigade (50%)  6-5, 4-4 PT NE) Divisional Artillery 2-5 SH-H PT) (High morale 6-5 first stonewall brigade is allowed from House Divided campaign rules set up and now augmented within a mixed brigade).

So the confederates have 14 brigade stands in total and I think the Union 13. I am assigning Divisional commanders for the sake of the game effectively promoting some of the brigade commanders from the actual day to command groups of 3 or 2 brigades. 

Confederate Forces at Manassas 

Joseph E Johnston overall command - this essentially has no "game" effect on the tabletop 

Army of the Potomac  (technically a Corps) - P.G.T Beauregard - "1" 

Corps Artillery - Alexander 2-5 R-F PT - Purcell (Virginia Artillery), Lynchburg (Virginia Artillery)

First Division - James Longstreet "1" 


We have a mini galaxy of confederate 2,3 and 4 stars appearing on the battlefield for this battle. I will take the time over coming posts to do my usual introductions but for now I will consign myself to a few pictures. I spent an inordinate amount of time introducing Lyons for the union for the battle of Rolla only to have him suffer the same fate as in real life ! Once elevated by General Lee a little later in the war Longstreet was one of the few commanders in the confederate roll call of the Army of Virginia not to come from that State. He was a Georgia man.  

Divisional Artillery - Shields - Washington (Louisiana) Artillery 2-5 SB S-H PT

Bonham First (Carolina) Brigade 4-4 PT NE, 11 th North Carolina, 2,3,7,8 South Carolina 


Milledge Bonham was appointed major general and commander of the forces of South Carolina at the outset of the war. He commanded the first brigade at Manassas. In 1862 he resigned his commission to take up his post as a representative for South Carolina in the Confederate congress. 

Ewell Second (Alabama/Louisiana) Brigade 4-4 PT NE 5,6 Alabama, 6,8 Louisiana 


Baldy Ewell is another star making his appearance. A regular army officer like many he resigned his commission at the outset of the war when his native Virginia seceded. Throughout the war Ewell petitioned the Confederate government for black slaves to be freed in return for service in the Army of the Confederacy. He was raised as a child in Manassas so should have known the ground well. In the actual battle his brigade was guarding one of the fords a long way downstream and did not see the actual combat which was concentrated in and around Henry Hill. 

Jones Third (Mississipi) Brigade 4-4 PT NE 17, 18 Mississippi, 5th South Carolina 

Stuart's Cavalry 2-5 

Second Division - Jubal Early "1"


Jubal Early began life as the commander of the 24th Virginia Regiment but I will give him a one of the divisions for Manassas as he was promoted immediately after the battle. I will hand over command of his brigade to Kemper.

Divisional Artillery 2-5 SB-H PT

Kemper First (Virginia) Brigade 5-4 PT NE 7th Louisiana, 13th Mississippi, 7th and 24th Virginia 

Cocke Second (Virginia) Brigade 5-4 PT NE 8,18, 19 28 and 49 Virginia 

Wheat Third brigade 4-4 PT NE 1st Louisiana (not yet the crack "Wheat's Tigers" I don't believe who gave service in the valley but I will paint them for some variation from grey and butternut, 4th South Carolina


Third Division - Nathan Evans "1"

Divisional Artillery 2-5 SB-H PT

Holmes first (Arkansas/Tennessee)  Brigade 4-4 PT NE 1st Arkansas, 2nd Tennessee

Garland second (Virginia) Brigade 3-4 PT NE 5th North Carolina, 1, 11, 17 Virginia 

Wade Hampton's South Carolina "Legion" third brigade 3-4 PT NE 


Whilst unassigned in the ORBAT for Manassas we will designate the Hampton Legion as a brigade and give it a run out at Manassas. The "Legion" was a fully independent force consisting of cavalry, artillery and infantry but for the purposes of the game we will assign it as a brigade to one of Beuregard's divisions. 

Army of the Shenandoah - technically a "corps" Joseph E Johnston "1"

Corps Artillery Pendleton 2-5 R F 

First Division Thomas Jackson "1"


I have promoted Jackson to command a division early for game purposes. He can gather the the forces to hold the "Stonewall" on Henry Hill. It is unclear as to whether Bee below was refering to a stonewall or describing Jackson as a stonewall. In any event the name passed to the Brigade.

Divisional Artillery Rockbridge Artillery (Brokenbrough) 2-5 SB-F PT

First "Stonewall" Brigade (Virginia Cummings) 6-5 2nd, 4th, 5th, 27th, 33d Virginia

Second Brigade (Georgia) Gardner 4-4 PT NE 7th, 8th Georgia

Second Division Bartow "1"

Divisional Artillery (Culpepper/Staunton Virginia Artillery) Imboden 2-5 SB-H PT

First Brigade Bee (Mixed) 4-4 PT NE 4th Alabama, 11th 2nd Mississipi 


"Mississipi ! There is Jackson standing like a stonewall. Let us determine to die here and we will conquer ! Rally behind the Virginians". And the rest is history. 

Second Brigade Kirby Smith 3-4 PT NE 1st Maryland, 3d Tennessee 

Third Brigade 3-4 PT NE 6th North Carolina, 10th Virginia 

That concludes the Union and Confederate orders of battle. With 27 individual brigades to model I need to paint now something like 480 10 mm figures as well as an awful lot more artillery and caissons. This will actually break the back on the painting I need to do for a long while with the game. They will not paint themselves butI will try and both enjoy the exercise and listen to some more educational material on the War. 

See you in hell Billy Yank ! See you in hell Johny Reb ! 


Monday 4 December 2023

Union Order of Battle for First Manassas or Bull Run


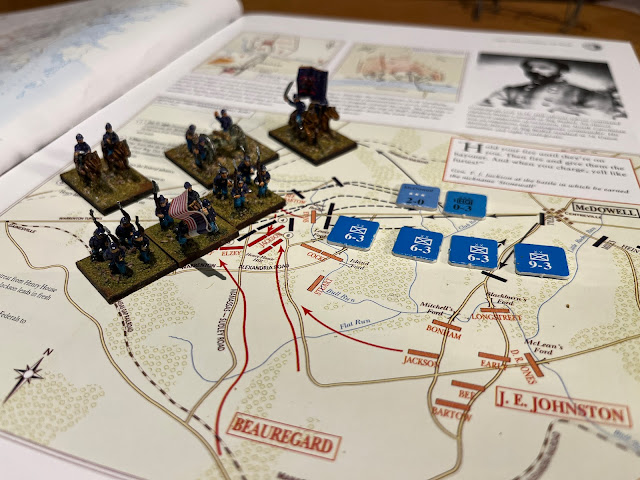
I am back into planning mode for the next tabletop encounter in my American Civil War Campaign. Above I have laid out the counters for the union side under McDowell's command from the hex that has attacked Manassas Junction. I am referring quite often to the Atlas of the Civil War edited by James Mcpherson. You can pick up a soft back A4 sized version of this relatively cheaply on Amazon which was very useful. 

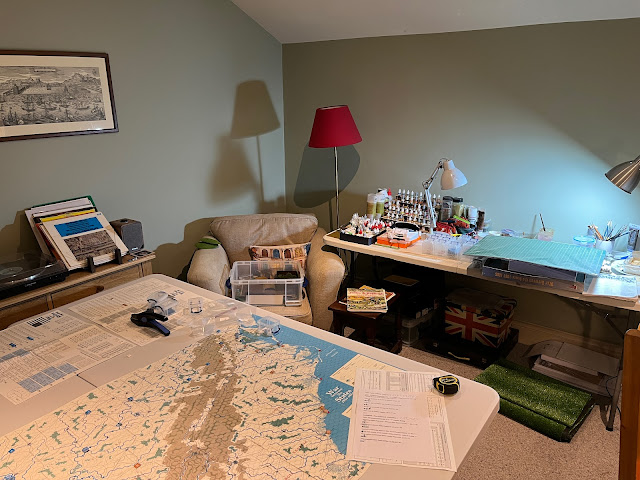
In case you think I am organised a quick shot of the current state of my study should disavail you of that notion. I have managed to find a way to fit in three 6 x 2.5' pop up tables together with my desk and armchair so that I can continue painting and keep the WBTS map set up to play out individual campaign turns. I  do not have room for the production spirals which I keep on roster. I have a system with marked up bags for the counters and of course my full webpage rosters which does allow me to move the maps around the house squatting where I am welcome. Production is now taking place on the roster with counters being assigned to ziplocks. The main front room with its dining table and lounge area in front of a tempting open fire which can take a sizeable battlefield table will be off limits this side of Xmas. I have retreated to my study ! In some ways it's a cosier existence. I need to get some more themed pictures up. 


Lots to work through. 

I thought I would determine a date for my battle in the first week of August and opted for D6 + 1. A throw of "4" results in a date of 5 August 1861. A little over 2 weeks from the real event on 21 July 1861. I have already determined with a dice roll that the battle will commence with a Union attack somewhere at 11 am. 

So the union counter Order of Battle begins with the commander  McDowell *** 2-0 who sits on top of  the First  Corps HQ counter. As a *** Corps general McDowell  can command up to 3 divisions using the HQ together with 1 further division all in the same or an adjacent hex (only when using the HQ).  In this case he is stacked directly however with I9, I6, I6, I6. So three fairly average sized divisions of 6,000 men and one oversized division of 9,000 men. I am going to allow each divisional counter on either side a divisional commander for tabletop purposes only which we can name for now and which will operate under normal V&B rules (adding 1 to morale if attached). As the divisional leaders will not operate as counters on the map if they suffer a casualty I will treat that as a wound that takes them out for the rest of battle only rather than applying any additional jeopardy for the campaign. Should a side attach a Corps or Army level commander and suffer a casualty (McDowell, Beauregard or Jo Johnston) then we can roll for medium to long term consequences. This will allow both sides to order and operate their forces on the tabletop and give me a good game.

All of the Union troops present are Green, so morale 4 and "Poorly Trained  No Elites" at this stage. The only veteran original counter in the East for the Federals is the I3 for the 6-5 US regulars in Washington (which might be modelled as 2 x 3-5 on the tabletop. The simplest way to fill out the Order of battle would be to have two brigades in three of the divisions (so 2 x 6-4). This would require the least amount of actual painting. Looking at the actual Order of battle for the Union at Bull Run there were in fact 5 divisions. One had no brigade structures so was a collection of volunteer regiments or battalions as it were and the four organised divisions (First, Second, Third and Fifth Divisions) had 4, 2, 3 and 2 brigades (respectively). So broadly 3 brigades for each Union division would be more accurate. An average Brigade strength was about 2-3,000 men dependent on the strength and number of constituent regiments. A full strength civil war regiment could be as many as 800-1,000 men at the beginning of the War and especially on the Union side. I think then in order to have a decent number of manoeuvre units for the Union on the table I am going to model each I6 counter as 3 x 4-4 PT NE brigades. The I9 brigade I could have 4 brigades as 2 x 5-4 PT NE and 2 x 4-4 PT NE. That gives me 13 brigade stands in total to produce. 

In terms of artillery I am going to give each division its own brigade of artillery and retain a Corps artillery stand with the McDowell. The Corps artillery will be rifled (2-5 R-F PT) and the Divisional artillery can alternate between "heavy" and normal smoothbore field pieces (2-5 SB-H PT and 2-5 SB-F PT). The Field, "F" pieces can be parcelled out as Designated Guns "DG" as a point for two brigades. I think I will retain the artillery stands as they fun to have on the tabletop. 

I need then 4 divisional commanders  to operate as command bases and some brigade commanders to attach as names to each of the 13 brigade stands. Heintzelmen is currently in the West chasing Price across Missouri so if we used the 4 remaining historical Divisional commanders from Bull Run these will be Tyler, Hunter, Runyon and Miles.  I will fill out some colour and background for each of these divisional commanders as I assemble them the stands for the tabletop. Some familiar household names will appear as Brigade Commanders the war commences.

Union Army of Northeastern Virginia (effectively a Corps organisation under the rules) 

McDowell - *** Corps Commander -  "1" rating. Technically a "0" rating. McDowell should not provide any improvement to a unit's morale during the battle if he attaches to it but he can of course assist with rallying etc. I think I will however allow him to attach with a value of "1" as it may be fun to put him in jeopardy ! The real worth of on map counter commanders is their ability to organise and move units. 

Artillery Reserve (Maj.  William Barry) 1st United States Artillery 2-5 R-F PT (No exhaustion)

First Division - Brigadier General Tyler - "1" rating Exhaustion 7 

First Brigade (Col. Erasmus Keyes) 1st, 2nd 3rd Connecticut & 2nd Maine 5-4 PT NE 

Second Brigade (BG Robert Schenck 2nd NY Militia, 1st and 2nd Ohio 4-4 PT NE

Third Brigade (Col William T Sherman) 13, 69, 79 NY and 2nd Wisconsin 5-4 PT NE

Fourth Brigade (Col Israel Richardson) 1st Mass, 2nd & 3rd Michigan, 12th NY 4-4 PT NE  

Divisional Artillery Brigade (Col Romeyn Ayres) 3rd United States Artillery 2-5 SB-H PT 

Second Division - Colonel David Hunter - "1" rating Exhaustion 5 

First Brigade (Col. Andrew Porter) 8,14 and 27 NY 4-4 PT NE

Second Brigade (Col Hobart Ward) 1st 4th Michigan, 11th NY 4-4 PT NE

Third Brigade  (Col William B Franklin) 5th, 11th Massachusetts, 1st Minnesota and 4th Pennsylvania 4-4 PT NE

Brookwards NY Artillery Brigade (Col Brookward) 2-5 SB-F PT

Third Division - BG Theodore Runyan - "1" rating Exhaustion 5 

First Brigade (Col Orlando Wilcox) 1st, 2nd 3rd New Jersey & 41st NY 4-4 PT NE

Second Brigade (Col Ambrose Burnside) 2nd New Hampshire, 1 and 2 Rhode Island 4-4 PT NE 

Third Brigade (Col Oliver Howard) 3rd, 4th, 5th Maine & 2nd Vermont 4-4 PT NE 

Rhode Island Artillery (Col William Reynolds) SB-F 2-5 PT 

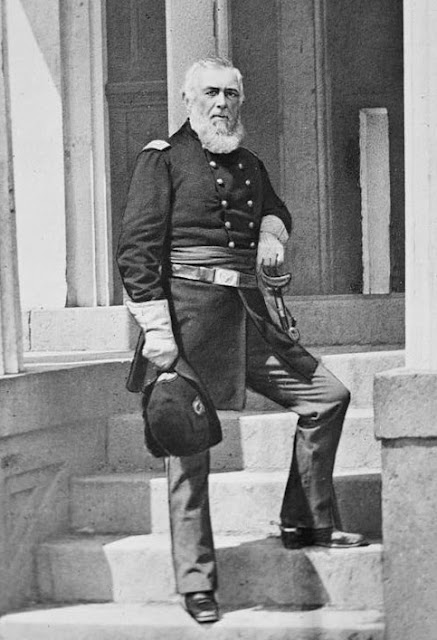
Fourth Division - Colonel Dixon Miles  - "1" Rating Exhaustion 5

Above : Colonel Dixon Miles at Harper's Ferry  (see attribution at site footer

First Brigade (Col Louis Blenker) 8, 29, 39 NY 27th Pennsylvania 4-4 PT NE

Second Brigade (Col Thomas Davies) 16, 18,  71 NY 4-4 PT NE 

Third Brigade (Col Calvin Pratt) 31, 32, 38 th NY 4-4 PT NE 

Divisional Artillery Brigade (Col Charles Griffin) 5th United States Artillery 2-5 SB-H PT

That gives me a painting target of a further 11 Union 3" square brigade stands and 4 more artillery stands together with their limbers if I want the whole look to be good ! In terms of 20 mm square stands with 4 infantry figures that 44 and stands or 176 figures. I will also need 4 divisional command bases and a Corps style command base (3 figures). I wondering whether to switch to round bases for commanders. 

My next post will be on the scenery while I crack on with the above this side of Xmas.

See you in hell Billy Yank ! See you in Hell Johnny Reb ! 


Saturday 2 December 2023

Week 1 August 1861 (Union Turn) - First Major Clash in the East


Above : Henry Halleck (see site footer

"I will not attempt to hamper you with any minute instructions" Henry Halleck to John Pope in respect of the capture of island number 10

So "Old Brains" is installed as Chief of Staff in Washington early and it's time for the chit draw for the first turn of August 1861. Union threats are starting to brew in both the East and West. In North Virginia  a strong force of 27,000 men organised as a Corps under McDowell has crossed the Potomac and has been organising itself for several weeks. This strong force is preparing to attack around 29,000 men gathered under the combined leadership of Beauregard and Jo Johnston at Manassas Junction. 


In the West a number of further threats are brewing. An advance guard under McLennan is at Cairo with options to move on Polk at Union City. In Missouri a battle hardened force of 7,000 cavalry and infantry under Heintzleman remains at Rolla and could continue to press Price and the remnants of the Missouri State Guard who have slid across to Ironton. On the Ohio River Stoneman has arrived in theatre to take command of the departmental garrison at Evansville. From there the Union may attempt to a swift invasion of neutral Kentucky. 


The clock is always ticking for the Union politically under the Strategic victory point situation. The Union must capture four victory point cities East of the Mississipi by August 1862 or the Confederates will clock up victory points each turn and eventually be able to successfully roll against the tables for a victory or Foreign Intervention to bring the War to an early close. As a reminder the main target cities for the Union are Richmond, Nashville, New Orleans, Memphis and Atlanta. The second tier of cities include Charleston, Chattanooga, Corinth, Knoxville, Mobile and Vicksburg. This should inform the axises of attack for the Union. Clearing the Mississippi should be a key aim for the Union and from both ends if possible. Seabourne assaults could be attempted for each of Charleston, New Orleans and Mobile. Finally an overland campaign through the heart of the confederacy to take Nashville and then to cut the central rail line and take Knocksville, Chattanooga and Atlanta could be attempted. The Confederacy will always have limited resources that must be husbanded and cannot defend in strength everywhere. In some ways however both the Strategic targets and the availability of Headquarters organistions and competent leaders with initiative will guide the Union sides' progress. 

Kentucky's neutrality is an annoyance. If the Union moves through into the State its legislature will declare for the Confederacy however a swift campaign could then take place to secure the main cities and the Tennessee and Cumberland rivers. The Personnel Point bonus to the Confederacy is not massive.  It effectively provides roughly 60 Personnel Points to the Confederacy over 6 months in comparison to 30 for the Union so the difference is not that great. This is really not more than a couple of divisions. Cessation will however deliver 6 towns and cities to the confederacy which will  produce Production Points. This resource is set to take a leap up in October as the cotton harvest is brought in. This could be worth a small boost to the cause until they are taken back. Given that the Confederacy is unlikely to invade the Kentucky themselves for fear of losing that advantage and giving a gift of yet more resources to the Union has time to gather its forces before a swift invasion. 

On balance in the West for now I think that Heintzelman should continue to pursue Price and then combine with McLennan to seek to knock out Polk and dislodge the Confederate stronghold at Union City the top of the Mississipi. I have noted from the rules that despite Missouri declaring for the Confederacy the railcnet in Union still belongs to the Federals. 

Strong naval forces will be arriving in theatre in a matter of months so early 1862 could be the time to attempt the invasion of Kentucky. In fact a river bourne invasion would not immediately violate neutrality if aimed at Nashville bypassing Kentucky and using the Tennessee and Cumberland rivers. I think it better to move swiftly on the key cities that would contribute to the Confederate cause, hold territory and threaten Nashville. Nashville would be the first major strategic loss for the Confederacy. 

On the  Confederate side the other hemisphere of my strategic brain keeps coming back to the simple maxim that the Confederacy does not need to "win". It just mustn't "lose". The Confederates have there a new nation - it simply needs to dig in and hang onto it for now. Concentrating forces and blocking potential moves and reinforcing key strategic cities is the aim of the game. For example why attack Ivrvin McDowell North of Manassas ? Richmond and some of the small towns and cities such as Fredericksburg and Lynchburg, Charlottesville and Gordansville  need to be defended but there is no immediate strategic advantage to throwing McDowell back across the Potomac. Better to continue to consolidate forces and focus on having an advantage when attacked. The topography of Virginia presents the Confederates with a series of East/West rivers providing natural defensive lines. 

Initiative Chit Draw

I use my wife because I can feel myself hoping that the Union remains stalled in North Virginia - I have to paint those bases at some point ! Also I think I know what each Chit looks like now even if reversed. Again I swear that my wife is a zealous abolitionist and Lincoln loving Republican. The Confederates opt for the safe "2" in parenthesis under the WbTS boardgame rules. Of the remaining 3 options - "0", "1" and "3" Jane picks the "3" from the cup. The Union takes the initiative and has 3 guaranteed initiative moves which is remarkably useful given the very low initiative of Union commanders to get anything done independently. 

Union Moves 

(1) Heintzleman ** and the I5 and C1 counters he is stacked with continue the pursuit of Price backed by (2) the supply train.  They move across to A2415 and A2414.  Heintzleman can order a division and a brigade as a ** Divisional commander so moving the supply train to ensure that he can engage in combat healthily when he catches Price will cost another chit initiative.


(3) One of the I5 divisions at Harpers Ferry has moved to join Banks at Baltimore. Incidentally the Federal  Naval Transports are nearby. The Northern papers trumpet the potential for seaborne invasions along the East coast of the Confederate States alerting the Confederacy to the potential danger. Should the Confederates then use valuable resources to garrison each city on its coastline ? I have been toying with the idea of building up garrisons where I can to create a fighting reserve that can react to threats. The arrival of a substantial force threatening key cities such as Charleston or Atlanta would require a significant reaction that would then of course weaken resources elsewhere. The Union has the advantage of the Sea, the Ohio river and eventually the Mississippi (if it can take it) creating a contiguous exterior line of communication from where it can assault at will. This is Winfield Scott's Anaconda plan in its full glory. 

There are of course the potential for initiative moves for the union as well. 

Only Stoneman at Evansville makes his initiative roll (he gets a “2”). I think he needs a larger force to move into Kentucky than the 6,000 militia and garrison he currently has. Potentially he can take some militia with him to create a depot when he does move but he should take at least a strong infantry division to have any chance of success. This will be the thrust towards Nashville when it is ready. 

The more you "run the board" for the Union  to generate threats to the Confederates the more you realise that the Confederates are constrained strategically to defence and possibly counter punches  e.g. in the form of raids in strength in the North or to retake territory in the West. The experimental political victory point rules I have adopted from WbTS are particularly elegant at capturing this "mood" to proceedings.  

Combat Phase 

Heintzleman is not yet in a position to attack Price. Again Mcgruder has a series of increasingly agitated telegrams from Lincoln demanding that he march on to Richmond by destroying the confederate main battle army right in front of him. 

Will there be any progress in the main battle theatre in Virginia ? 

The union rolls a 1 which is good for  McDowell's initiative of 2. McDowell is stacked on a Corps HQ and as such can attack with all 4 divisions with him - the 3 x I6 counters and the I9 counter - 27,000 bayonets. Facing him are Beauregard and Jo Johnston with fully 29,000 men. Finally the slow preparations of Union have resulted in a clash. 

This is the mid-sized encounter I have been looking forward to as a tabletop project to take my gaming resources forward  - a clear step up from the  Battle of Rolla. I will need to (1) design and dress the tabletop. (2) Draw up Orders of battle and organise units within my divisions - naming the stands and regiments and (3) decide on how I deal with the battlefield rules for the day and the arrival of units and so on. There are a number of rules questions for me to consider. The battle should be large enough however for me to properly divide up the forces into “divisions” or forces and assign wings or a strategy under the Road  to Glory system. I will allow each side sufficient battlefield divisional commanders within their counters as well as the *** and **** generals present as overall Army/Corps sized commanders. 

Painting wise I will need to produce probably half a dozen more 3" infantry  stands for either side to be able to play this but ultimately I will need upwards of 30 stands a side for the biggest battles in any event. In terms of 20 mm square bases I should now just get the production line rolling again. I have taken delivery of some very nice Black Hats and Zoaves that could make an appearance. I am good for cavalry. Stuart will be present with a small brigade of cavalry however there are no cavalry on the Union side. I will need probably a fairly significant amount of artillery unless I model this at Divisional Guns. 

In terms of scenery I think I need two “tiers” of hills so some foam board shapes that can sit under my cloths will win the day. My existing collection of hills can then just produce the second tier or standalone hills. Henry Hill was of course the focal point of action at Bull Run on 21 July 1861 but it needn't be in this encounter.   I also need a stone bridge and possibly just more trees again ! I am not sure yet how big to make the tabletop.

To keep things simple there is a good map for a Bull Run Scenario on the Volley and Bayonet  internet pages. But this really covers an area dictated by what the two sides on the day actually did. In reality both sides tried to turn the left flank of the other by an attack. This was called off on the Confederate side to defend against the Union assaults of Henry Hill. All reserves arriving at Manassas Junction by rail were eventually thrown this way (notably Jackson's first brigade) prior to general assault by the Confederates leading to a Union collapse. 

I have also ordered a second hand copy of Eastern Battles which supports the Fire and Fury system. That should also have a map and order of battle I can lay onto my counters. This is the moment that the troops become real and take on a character and identity. There is a wealth of information available on the internet obviously. I am taken by the concept that the Union has a multitude of potentially fords and crossing points along Bull Run from which it can attack. The overall concept for the scenario could be the the Confederate needs to make its deployments and then the Union axis of attack will be determined. There is no need for complex rules for the arrival of a strategic reserve by rail as the Confederates have been concentrated at Manassas junction for several weeks. 

The full table itself could be up to 12 feet long x 6 feet  deep depending on how I orientate it. I want take in all the potential river crossings if I can. This is a great project within a project and one that will take me beyond Xmas I expect to get on the table. The key for me is to keep the battle fresh, fair and give both sides a good chance. Most of the troops will be very raw and unproven. Both sides will though naively see the opportunity for that “knock out blow”. The object of this whole campaign for me is primarily to have fun, create some beautiful tabletop battles and essentially tell a story. I should also gain some understanding of the big picture and learn some history as go along. 

I ordered a small piece of astroturf last week to have a go at some crop fields given that the battle will take place in August. My battle of Rolla was lacking in corn ! Spray painted a corn colour the Astroturf  should be quite good. The rules for corn fields block line of site until they are trampled by a crossing brigade. Perhaps I can have two versions - one for the corn standing and one for the corn trampled ! 

Time to retreat to the study/modelling room for a couple of weeks to get this on the table ! I doubt the Great Republican will allow a 12 foot x 6 foot table to appear in the "Front Room" this side of Xmas competing with the tree and dining table. 

Overall I am very excited now again to deliver a larger battle that will deliver a result in the grand campaign. Who will go limping back to the capital on this occasion as the Summer of 1861 draws to a close ? Will the Union sweep on to Richmond or will this first foray into Virginia end in the debacle of the “Great Skeedaddle” as it did historically.

There is one final thing I can decide on with a simple dice roll. The V&B House Divided campaign rules have a system for determining the start time for the fight (see Rule 8 Battles here). In August sunset is at 5 am - adding to that a roll of D6 the Union attack will not take place until 11 am. As sunset is at 7 pm the Union forces will be limited to 8 turns of action on the first day. It is possible that we could be in for a multi-day battle

See you in hell Billy Yank. See you in hell Johnny Reb ! 


Thursday 9 November 2023

Strategic Turn August 1861 - Missouri Joins the Confederacy !

"All we ask is to be let alone" Jefferson Davis  (above Confederate cabinet - see site footer

Housekeeping time. 

I am really enjoying this campaign now and feel "across" it terms of the organisation and maintenance. I can probably stop worrying so much as whether I am doing it "right" and just get on with it. I am already into the counter factual with McLennan appearing in the West. I have had a small tabletop battle with a result and with the death of a Union leader. I have promoted units in terms of their morale, applied recovery after a battle and adapted rules as I have needed to. I may come to regret the level of detail that I am building into the campaign as a result of using the 3 Map spread and eventually several hundred counters for tracking and tabletop conversion but it's what I wanted to attempt. The whole war. I worked out the other day that there are 5,600 10 mile hex locations on the map - granted perhaps 20 % of those are ocean but that is still an immense amount of detail for essentially a tabletop campaign. 

With that flexibility and scope McLennan may be doing something strange at the moment but it made sense looking down from the North to secure Cairo and with Lyons' demise I needed a commander to get the resources to where they are wanted. He can come back East in due course when needed or e.g. when Grant arrives. With an initiative of 1 to my mind McLennan is absolute Hindrance to progress but perhaps good for moving a large force which could then fight at Corp strength ? McLennan was notoriously cautious, inventing phantom tens of thousands of men opposing him and insisting on the perfect position before he would advance. No Alexander he. The army loved him precisely because he didn't throw them rashly into fights. In other words he just didn't fight ! 

August 1861 will be a little more complex as a strategic turn as I am going to need to test each sides supply nets. If a unit or stack is out of the supply net but demands resources on a die roll  then it could suffer from attrition. There is also the potential this turn for some of the Union or  Lincoln's 90 day volunteers to disband.

A Siege Phase on the map (none occurring this turn)

B Production Phase

C Supply and Consumption Phase; and

D Political Phase (Last month the Confederacy tried and failed on a D6 political roll to secure either of Missouri or Kentucky for the Union. A further roll would cost the confederacy a Tarif in Victory points so would be a risk. Neither side has secured any victory points - the tally is 0-0)

B Production Phase July 1861 

(1) Supply Point Generation Segment 

Union has 265 SP  left over from last turn and receives a further 150 points for the August game cycles. The total then is 415 points. The Union receives  90  Personnel points for 8/61 Initial Call which it uses in its entirety (see below). 

Confederates have 83 SP left over and receive supply as follows - Richmond 10,  Nashville 10, Memphis 5, Atlanta 5, New Orleans 10 (40). Confederate cities are valued at 0 this turn but unblocked ports receive 1 point. There are 15 confederate ports (New Orleans also receives a port import supply) but Pensacola and Norfolk remain blockaded in August as described in the rules by Forts Pickens and Fort Monroe respectively - so 13 for import. The total then is  136  SP.  The Confederates receive 70 Personnel Points for the 7/61 Initial Call. 

(2) New Unit Initiation Segment 

There are two ways to produce new units. Either side can simply create Infanty, Cavalry, Militia units etc. by paying the necessary costs in full in both supply and personnel points. A second option is to convert existing militia or garrison points into infantry brigades by removing relevant counters on an unbesieged department and replacing on the production spiral with a counter of the appropriate value. This is a cheaper way to create regular units in terms of personnel points.

Union 

Conversion

For the Union it costs no personnel points and 2 supply points to convert militia to regular infantry division/brigade counters. The relevant costs are 1 and 1 for garrison points. The counters appear after 4 cycles on the production spiral. 

C2806 Dep Middle Baltimore remove 2 x M2 place 2 x I2(PT1) Production spiral 12/61 cost 8  SP

A2712 St Louis Dep Missouri remove M2 place I2 (PT1) Production spiral 12/61 cost 4 SP

C3401 Philadelphia Dep East(West Counter) M2 place I2 (PT1) Production spiral 12/61 cost 4 SP 

A5309 Cincinatti Dep Ohio M2 place I2 (PT1) Production spiral 12/61 cost 4 SP 

Purchase 

20  Garrison Points - cost 20 PP & 20 SP spiral 10/61(ch.)

 4 x M2 1 x M3 - Cost  22 PP & 11 SP spiral 9/61

I6, I5 - Cost 33 PP & 33 SP spiral 12/61

2x RT (20 SP) spiral 9/61 2 x NT (spiral 10/61 (40 SP) 2 xRF spiral 11/61 (40 SP) 2x NF spiral 11/61 (40 SP) (total 15 PP)

ST 9/61 (25 SP & 1 PP)  Spiral 9/61 

Confederate 

Conversion 

For the Confederates it costs no personnel points and 1 supply point to create infantry from militia and 1 and 1 from a  garrison point. The counters appear after 4 cycles on the production spiral. 

C1640 Charleston DepSCarol/Ga/Fl remove M2 place I2(PT1) spiral 12/61 cost 2 SP 

C2024 Raleigh DepSVirg/NCarol remove M2 place I2(PT1) spiral 12/61 cost 2 SP 

B2802 Memphis DepKen/Tenn remove M2 place I2(PT1) spiral 12/61 cost 2 SP 

C2516 Richmond DepNorthVirg remove M2 place I2(PT1) spiral 12/61 cost 2 SP

B1705 Little Rock DepTransMi remove M2 place I2 (PT1) spiral 12/61 cost 2 SP


Purchase 

5 x M2 - Cost  20 PP & 10  SP spiral 9/61 

G10   - Cost 10  PP & 20 SP spiral 11/61

RF - Cost 2 PP & 20 SP spiral 13/62

RT - Cost 1 PP & 10 SP spiral 10/62

C2 - Cost 6 PP & 8 SP spiral 

2x I2, I3 - Cost 21  PP & 14 SP spiral 12/61 

(3) Existing Unit Augmentation Segment 

Each side can remove an existing infantry or cavalry unit (one per department - not besieged) and replace it on the unit spiral with the additional points. This represents an organisation returning from the field to recruit and expand and is the cheapest way to add strength to an existing counter in terms of Personnel Points. I have decided that I will allow existing bases within a counter that have lost PT status to "top up" strength points without having to achieve  PT status again or to suspend any current "clock" on that status if its still exists. PT status then is not lost for time spent on the map. Where a counter expands such that additional bases are required to accommodate the new recruits then a fresh clock should start. I will need then a further number  against every base on my roster within each counter to track that clock (from 1-5)  On "6" PT status is lost. The No Elite "NE" status goes with the conferring of Veteran status in accordance with the House Divided rules. I will try to count/track this within the tracker - the simplest thing is to apply a date in brackets for when PT is lost after the PT notation - so I4 (all PT 2) or 4-4 PT (4) NE . It will be "a lot" but hopefully by stating the date and not setting a timer I will have to note just once. 

I think I could start off by noting by exception to 1/62. Any veteran status stands or counters will be noted. Any counter or stand not losing its PT NE status in 1/62 will be noted in the tracker. Over time adding new counter status or shifting it with counters to the spiral or on a merger between different aged units is all I will need to do. 

Union

I am not taking this option this turn which is perhaps a wasted opportunity

Cost infantry - 1 personnel point, 3 supply points, 4 time cycles 

Cost cavalry - 4 personnel point, 5 supply points, 5 time cycles 

Confederate 

There are no small infantry units to augment available on departments 

Cost infantry - 1 personnel point,  2 supply points, 4 time cycles

Cost cavalry - 1 personnel point 4 supply points, 2 time cycles 

(4) Produced Unit Deployment Segment 

Union 

The Union has 5 x M2 (PT0) strength points to distribute (I will mark PT0 on the roster to set them apart from other on-map Militia which will at present have a clock with "1" on. I will place these on each of the departments in St. Louis, Cincinatti, Evansville, Baltimore and Philadelphia as well as 20 Garrison strength points so G4(PT0) on each. 

Confederate 

10 Militia Points and 15 Garrison Points. M2(PT0), G3(PT0)  on Little Rock, Raleigh, Charleston, Richmond and Memphis. 

(5) Brigade Merge Segment 

Both sides can merge existing brigades (one or two point infantry units or 1 point cavalry units) with division counters (I3 + or C2 +) located in the same hex. I think the brigade bases in this instance can simply sit separately with its existing PT status as a base or join an appropriate base of the same PT status. If this is not possible I will try and achieve a sensible result with the PT status being diluted on average in terms of its ageing or by some other appropriate averaging mechanic. 

Union 

A2014 Rolla I2 merges with I3 (now I5 (Crack 60 % Sigel 5-6 1st and 2nd US infantry, Deitzler  4-4 PT  NE 1st Iowa and 58th, 68th and 76th Ohio Regiments) 

Any final M2 units in Beauregard's stack are merged into the larger units at  C2409 Manassas Junction

(6) Fort Production and Deployment Segment 

There are some spends that have been  programmed in for Washington for the Union and Richmond and Vicksburg for the confederates (the latter commencing this August turn). The question for both sides is if they spend on fortifications elsewhere. 

In July I commenced works for the Union in St Louis which will continue. 

Union

2608 Washington fortification programme - X2 placed (24 " of Field Works) for August (no new building see schedule). Upgrades to Fortress in 13/61 

St.Louis- X2 placed in July (24 " of Field Works 2-5 SB-SG  - further instalment of works will appear on October 1861) 

Confederate 

Richmond fortification program (see Start Summary on 2516 Richmond) - X2 placed (24" of Field Works for August see schedule)

B2317 Vicksburg Fortress Mississippi first instalment - (12" of Field Works)  

(7) Department Deployment Segment 

Union

No department this turn

Confederate 

Department to be placed on New Orleans, Dep Miss/Ala. Had a debate about placement on Atlanta. I think a department should be placed there in November the next time an option comes up. 

(8) Headquarters Deployment Segment 

Union 

Needs to Roll 1 on a D6 to place D6 Corps HQ - rolls 5 so no placement in 7/61

Confederate 

eg

Needs to roll 1 on D6 to place 1D6  x Army HQ counter - rolls 6 so no placement in 8/61 

(9) New Historical Leaders

Check back for promotions also 

Union 

Banks ** 1-1 


Nathaniel Banks was a political appointment by Lincoln. His initial contribution, assigned to command in Southern Maryland/Winchester  was to allow the forces in the Shenandoah to slip away and reinforce at Manassas Junction prior to Bull Run. A lacklustre contribution to the Shenandoah campaign against Stonewall Jackson's "foot cavalry" was to follow. Dismissed from that command he was appointed head of the Union forces tasked with invading the Confederacy from  New Orleans. He was eventually stood down after the disappointing Red River campaign in in Trans Mississipi/Louisiana. With an initiative of 1 and combat skill of 1 he is useful for moving a divisional counter and a brigade together with an initiative "chit point" but is unlikely to be able to order a strategic movement very often under his own steam. He could of course "amplify" the command of a Corps, Army or Army Group commander. 

Banks is placed on Baltimore to potentially lead a marine invasion 

Halleck ***** 1-2-0


Soon after the commencement of the war Halleck was appointed to command the department of Missouri in the West. The tide of war in the West went well for the Union with the capture of prizes such as Fort Donaldson and Island number 10. Halleck was to have a tempestuous relationship with his subordinate Grant. Grant would remain Halleck's subordinate as he was appointed to Army Chief by Lincon in 1862 in replacement to McLennan after the failed Peninsula campaign. Eventually Grant was given that supremo role by Lincoln with Halleck moving into the post of Chief of Staff. Potentially a 5 star General is able to command several field armies with no loss of initiative, command span or combat value.  Halleck only has an initiative of 1 and command space of 2. His command skill of "0" would be a positive disadvantage on the battlefield. 

I have realised that it's OK with an Army commander to situate them behind the front line. In effect they can exert influence when they have an appropriate HQ. Halleck has been sat behind a desk in Washington to potentially direct McDowell from there. 

(Stoneman ** 2-1) 

Stoneman began the Civil War in charge of Fort Brown Texas but refused to surrender to Southern sympathisers. Rather he escaped with most of his command and was given command of the 1st US Cavalry. When McLennan was given command of the Army of the Potomac after Bull Run he appointed Stoneman who he knew from time in the West Virginia campaign to command his cavalry. Division and Corps commands followed prior to a further cavalry appointment. Stoneman completed the war as a cavalry commander in the Department of Ohio in the West followed by an appointed under Tecumseh Sherman raiding behind confederate lines. After the War he had appointments related to reconstruction in the South but in 1882 he is elected Governor of California. He died in 1894 aged 72. 

Stoneman has an initiative of 2 which is the best we are getting this round for the Union. He is in parenthesis so he is a Cavalry commander. He will not suffer any loss of ratings if he is placed in control of a Cavalry Corps. This seems strange though as he is a  ** division commander who would normally suffer a drop in values if placed in command of a Corps. I'll not worry about it overly and cross that bridge. 

I have placed Stoneman in the new Union department in Evansville on the Kentucky border.

Confederate

A.S. Johnston **** 2-3-1 to be placed on Memphis. 


The Confederates get a single but pretty decent commander this turn - Albert Sidney Johnston. Johnston commanded the Western Theatre for the Confederacy until he death from a bullet wound to the back of the  kneed to Shiloh on April 6 1862. He had sent his surgeon to treat Union wounded and could have been saved himself by the application of a simple tourniquet. Johnston was the highest ranking casualty on either side. His death was a real blow to the cause and a sad loss for Jefferson Davis who considered him his most effective commander at the time. In April 1862 Lee was yet to take up command in the East.  

He was said to have had one in his pocket on his death. I will try and keep Johnston out of the firing line so that he can fulfil his greater purpose of field command of an Army HQ as a **** general when one becomes available. 

Albert Sidney Johnston has been placed on Memphis. 

(10) Confederate Replacement Segment 

Does not operate until 1862 but is a useful mechanic when it comes allowing garrison points to be sucked into line infantry counters as replacements. 

(11) Militia Demobilisation 

This will apply to the Union  for  August 1861. Union will need to roll a  D6  and on a result of 1 or 2 the militia points on the map are immediately reduced by 50 %. 

Union rolls a 4 so no demobilisation for the Lincoln 90 day men this turn. 

If a further incentive is needed to convert Militia  I have decided that the in-campaign promotion of all newly recruitment units so that they lose their PT status at 6 months will not occur for Militia who will also be unable to progress beyond morale level "Green" i.e they will not be able to promote to veteran and lose their NE ("No Elite" status) which applies in close combat.

C Supply and Consumption Phase

Union

The Union has 146 SP left following Production and Deployment.

The Union expends 17 points on maintenance supply so 129 SP are left and then 122 after broadcast (see below)

Further broadcast may be needed once the map is set up. I should ensure that each command has adequate combat supply going forward or is in supply/access to a depot. 

The Supply Train with McLennan is boosted to 5 points using the River The Supply Train supporting Heintzelman at Rolla is boosted to 5 points which costs 4 rail transport points as the  Supply Train is on the railway but not touching the River. 

Confederate 

The Confederates have 44 SP left following Production and Deployment. Testing for supply maintenance across all stacks reduces the total by a further 16 points. So 28 in total and then 23 after broadcast. Supply trains while expensive can just leave points on the map in the middle of nowhere which is quite useful. They can also accept broadcast directly. The difficulty with depots at this early stage is that they require 2 strength points of ground forces to create and the confederates are desperately short of manpower in the West. 

I need to consider further broadcast once the map is set up again. This results in boosting the supply trains at Little Rock and Memphis by 2 and 3 points respectively 

It might be useful to start to build up supplies in key strongpoints. 

D Political Phase July 1861 

The current political score for each side is 0. The only result that could be obtained by either side on the political tables in August 1861 is for the confederacy. On a roll of 1 on a D6 Missouri will join the confederacy and on a 2 Kentucky. This would cost the confederacy 1 victory point which would swing the point total to + 1 which would provide in a subsequent turn a roll with a chance of Kentucky going to the confederates and Missouri to the Union. Equally perhaps the Confederates should seek to win on the battlefield, gain a point and appeal on the -1 column. This could cause a foreign intervention shortening the war for the Union to 26 further months and doubling all confederate imports. 

None of these results are guaranteed but the chance of bringing Missouri or Kentucky into the war on the confederate side is possibly worth the gamble. There is a 50/50 chance of winning the battle against the Union main field army and then a 50/50 chance of getting some result on the matrix. Obviously a foreign intervention would be fantastic but a result following that route is a 1 in 12 chance of foreign intervention and a 1 in 6 chance of picking up Missouri or Kentucky overall then 25 % whereas a straight roll now giving up the chance of foreign intervention would yield a result with a 33 % chance. 

So the confederates need a 1 or 2 - A 1 is rolled and Missouri joins the confederacy. The table still moves to +1 with a point being given away. 

I am using the Kentucky/Missouri variant. The confederates will receive the following additional Supply Points :-

September 14 October 10 November 6 December 4 January 2 (Total 36) 

The Union has huge sympathy from the German population in Missouri and will receive the following Supply Points :- 

October 7 November 5 December 3 January 2 and February 1 (Total 18)

On interrogating the charts there is a similar 2 to 1 points split in favour of the Union were to invade Kentucky. Once ready the Union could do this in the knowledge that they would have an easier access route to the vital trans-confederacy railway and the heartlands of Tennessee. If a massive Union force was built up it would not be so burdensome if the Union could secure early victories. 

It is clear that Kentucky is unlikely now to come over to the Confederacy prior to significant battlefield victories. The Confederates should not invade Kentucky as the points for the Union are significant and also they may lose the possibility of adding 4 cities to their supply total. 

In short then the Confederates should wait and see what the Union does in Kentucky. It is likely that they will lose patience and cross into Tennessee and invade the heartlands of the Confederacy. There is something to be said for having access to Columbus in Kentucky for the Union on the same side of the River as Union City which is currently the confederates plug in the Mississippi bottle. Given their points total advantage and the clock running against them it would not seem wise to delay too long. It would however take the border of the Confederacy to the Ohio River. On balance I think the Union will invade Kentucky in not so long if it cannot secure its confirmation of Union status politically. The give away in personnel points to the confederates is not significant.  I am not sure how neutrality could ever work in this situation however large portions of the population were sympathetic to either side.  I can imagine that Lincoln will be fretful about his native State going the way of Missouri and will be hounding his Generals to secure at least those parts of the State sympathetic to the Union in East. 

I will now update the full summary of counters and brigade bases to take into the account all of the activity for the 8/61 strategic turn.  The next stage is to do a chit draw for initiative and to carry out the first game turn proper (of 4) for 8/61. Years in the game have 13 sets cycles of 4 turns. 


Tuesday 7 November 2023

Week 4 July 1861 - The Union Invests Cairo Illinois


Above : River Boats landing Troops at Cairo Illinois from Harpers Weekly - June 1861 (see site footer)

Chit Draw

The Confederates elect to take the "2" from the available guaranteed initiative chits. 

The Union draw a "1" initiative chit on this occasion. 

Confederate Turn

(1) Trapper's South Carolina Brigade I3 (2nd Palmetto and 10th and 19th South Carolina regiments) continues on its train movement delivering the Brigade to Nashville (costs 3 Rail Points).

(2) An M2 Alabama Volunteer Regiment brigade  from Mobile has moved by train at a cost of 2 Rail Points to B2408 about 20 miles from New Orleans. 

Union Turn

(1) McLennan boards river boats with a supply train and 3 supply points and M2 Thayer's Brigade (1st Nebraska and 58th, 68th and 78 th Ohio Regiments) to move to Cairo. 

The initiative role for McDowell and combat at Mannassas Junction is failed again ! 

The Mississipi is starting to bristle with volunteer regiments supported by flotillas of River Transport boats on Both sides. 


The Confederates appear to has shored up the defences of Nashville. In the East McDowel's  27,000 Union infantry that crossed the Potomac are in a stand off with the 27,000 Confederates under Jo Jonston and Pierre Gustav Toutant-Beauregard across Bull Run at Manassas Junction. 

Thats the end of July 1861. I will update the Living Tracker and then take a pause to consider the strategic turn for August 1861 which will deliver new  leaders, volunteer units and resources into theatre.


Week 3 July 1861 - McLennan Moves West


"Up Alabamians !" General Bee at Bull Run 21st July 1861 (see site footer) 

Towards the end of the second week of July McDowell has led 27,000 men across the Potomac from the capital Washington to meet the massing confederates in the field. Jo Johnston has slipped away from Winchester with two divisions totalling 8,000 men to join the 19,000 men and 1,000 cavalry of General Pierre Gustave Toutant-Beauregard. If McDowell can seize some initiative he will be able to bring the confederate main army in Virginia to battle with the hope of destroying it and marching on to Richmond to sieze (or siege) the rebel capital and end the war. This was the plan. One decisive battle and an end to the war ! There are of course victory points to be won for large battles. 

Initiative Chit Draw

The confederates elect to take the number "2" chit - their safe option so the possibilities for the Union are "0", "1" or "3 guaranteed moves. I pass a small cup to my wife while she is watching telly - she is clearly a  Lincoln loving South hating Republican as the Union draws the "3" chit.  This should make things very interesting for the ensuing turn. McDowell will still need to roll a 2 or less to be able to start a set piece battle. The Union will move first however and has 3 guaranteed moves. 

It's good to remember that in order to be "on the right track" politically the Union needs to take a fair few strategic Southern cities by September 1862. It can never be all about Richmond although clearly taking Richmond would have a dramatic impact on the South politically. The chances of Foreign intervention would all but disappear and the confederacy would lose valuable resources each time turn. I have conducted a detailed review of the Victory point system and strategic priorities for each side at my post here which is alway posted at the top of my home page. 

I love to sit at the Northern end of the table and look "upside down" at the map from the North down. If we assume that the Union for now does not want to provoke Kentucky to join the confederacy by violating its neutrality then the corridors of advance become quite obvious. There is always the possibility for the Union to pick up victory points and then to apply for Kentucky to come out for the Union. While it is a logistical headache the more time I spend "upside down" the more I notice the advantages that the Union has with its almost "reverse" interior lines. The Ohio River allows the Union to shift troops rapidly by water from the East right across to the top funnels of the Cumberland River which heads down to Nashville and to the Mississipi to threaten Memphis. Littered about the map the Union has significant resources that once collected under a leader could prove to be an absolute headache for the Confederates. 

There is also something to be said for ensuring that all departments have infantry divisions ready for the next augmentation opportunity. 

In summary then initially in terms of big "ideas" for the Union there is the assault on Richmond. The Union has commenced the war in Virginia by crossing the Potomac. Out West there is key strategic goal of clearing the Mississipi and taking the major cities along it. This would in turn open up Tennessee with cities such as Nashville. Finally there is always the option of stretching the Confederates thin with a coastal assault against the interior of the confederacy. The coast of Georgia or the Carolinas could be the stage for sea bourne landings. Further and while the Confederates would have good notice of any attempt there is nothing to prevent the Union making a landing in the Gulf to try and seize the major city of New Orleans. That would be a blow to the confederates and open up the Mississsipi corridor from the Southern end. 

Union Moves (3 Guaranteed Initiatives)

The Union undertakes some building and consolidation in the West with the guaranteed initiatiations. 

(1) The Unions 3-3 infantry division on Jefferson City moves to join Heintzlemans command at Rolla and sloughs off a 2-3 brigade. The  I1 brigade will be able to merge with the I3 counter and Heintzleman will be able to command the resulting I4 and I2 brigades from August. Equally he could just command the current I3 and I2 counters in turn 4 of July to pursue Price. 

(2) The River Transport unit at Cincinatti transports McLennan, the supply train with 4 supply points and an M2 counter to Evansville which is just about manageable in terms of the "40" point for the River Transport. 

(3) The river transport unit at St Louis transports the M4 counter to Cairo in Illinois. 

Finally, the Union tries to initiate combat using McDowel's command against the Confederate Army at Mannassas Junction but is unsuccessful. 

Confederate Moves (2 Guaranteed Initiatives)

(1) The Weightman's State Missouri Guard brigade (M2) unit trailing Price and Cawthorn's State Guard Cavalry cavalry unit from the defeat at Rolla movs to reunite at Irontown. 

(2) An I3 South Carolingian brigade from Fort Sumter crosses the swamp entrains and then travels by rail to Stevenson B4704 (Heading for Nashville)

Looking at the list of Union target cities it is clear that the South needs to secure Tennessee in particular. 

The strategic position in the West is beginning to look interesting.


The fact of the matter is that unless the Union rolls a "2" for combat initiative it cannot launch the assault at Mannassas Junction. That must occur at some point ! In the meantime my divided brain can continue the build up in the West. 


Monday 6 November 2023

Week 2 July 1861 - McDowell Crosses the Potomac


"Colonel there is no use dodging. When you hear them they have passed"  

Joseph E. Johnson to a flinching Colonel on the Peninsula before he was hit himself. (see site footer)

Northern newspapers are trumpeting the victory in Missouri and there are outpourings of celebration but also national grief in respect of the fallen hero Lyons. Lyons is the first General Officer to die in the war (again and thanks to my stupidity in attaching him to a confederate brigade in the thick off it - history repeats itself and the Union loses its highest initiative commander).  News also reaches Richmond of the set back at Rolla. Jefferson Davis is under pressure from the public and there are calls to eject the Yankee invader from Virginia. The Confederates can wait for the Union to make a move. The historical reality at this point is that both hoped thought that one decisive battle in the East would settle the matter. I could be cautious for the Union however tying down large amounts of troops to protect Richmond is an end in itself. 

Joseph E Johnston is technically the senior officer in the field on the confederate side. I am not sure of the extent to which he and P.T.E Beauregard would have cooperated daily but we know historically how they managed to mass their troops at Mannasses junction to defeat the first union thrust at Bull Run. 

In essence the strategic position on the map overall is largely unchanged apart from the set-back for the confederacy in Missouri. I discussed the overall strategic position in my post for the first turn here . It's almost 3 months since I wrote this piece so I have had to remind myself of my initial conclusions. 

The CSA elects to take a guaranteed "2" as their initiative chit drawer. The options then for the Union are 0,1 or 3. I let my wife draw the chit to avoid any bias karma infiltrating the cardboard and a "1" arrives. The union will finally be able to perform some guaranteed movement but after the Confederate turn. 

Confederate Moves 

(1) Price uses a Confederate initiative and orders the M2 and C1 counters (The surviving elements of Weightman and Cawthorn's brigades of the  Missouri State Guard) with him to move. The Cawthorn's cavalry counter moves as far as Ironton A2517. Weightmans Missouri State Guard brigade (M2) marches as far as A2117. Ironton is in supply (being 3 infantry move points from the Mississippi). It also continues to threaten St. Louis as the Missouri railroads can be used by either side while Missouri remains neutral. Although Price's force is possibly no longer a real threat but could be reinforced by Polk in the South. 


(2) As a backfill to logistics (I forgot to consider combat supply in the first turn I am going to allow the confederates to broadcast 6 points to a new depot at Manassas Junction. An I2 counter will be lost to make the depot. 

(3) For the second initiative move the supply train at Manassas Junction is going to ship 4 supply points to Winchester.  I think the stack at Winchester C2108  requires access to combat points in case it is attacked or wants to attack 

Jo Johnston is able to roll a move initiative - 3 or less on a D6. 

(4) One of the I5 divisions sloughs off an I2 brigade which will remain at Winchester and Jo Johnston and an I5 and I3 march to reinforce Beauregard at Manassas junction. If McDowel decides to attack he will be facing a much more even fight now that 8,000 troops have joined Beauregard at Mannassas junction 

Those are all the confederate moves.

Union Moves

McDowell in command of the first corps HQ can move 3 divisions within the corps and an additional unit or division as a *** leader. He crosses the Potomac with the I9, I6 I6, I6 counters. I think it could be wise to concentrate additional forces before an attack. There is an I5 division next door in Alexandria and a further I3 veteran division in Washington. It may be worthwhile switching in Mclennon  prior to attack but then again McLennan has an initiative of 1 so he may not be able to attack in any event ? The command and control in War Between the States is somewhat frustrating but I quite accurately. In early 1862 for example Lincoln was unable to get McLennan to attack for many months and then again on the Peninsula he was continually plagued by over-caution and over-estimation of the force opposing him. Lincoln was continually frustrated that having built an army McLennan was not particularly disposed to use it. 

McDowell has an initiative of "2" so on a D6 he should be able to give combat on average at least once every 3 months.  Any battle at the moment would be a broadly equal one. 

From a personal point of view it will commit me to a good 1-2 month's painting as I think I will need about 50-60 more small 20 mm square bases each of Union and Confederate infantry (4 x 10 mm figures to a base and 4-6 making up a 3 inch square volley and bayonet brigade bases. As the war progresses the figure requirement is only going to increase. By 1862 both sides could have as many as 80,000-100,000 men in the biggest field armies in the East and West. An 80,000 strong force will need around 40 x 3 " stands on each side which is 240 bases or close to 1,000 figures a side. There is no getting around it. I think the table sizes will also increase to about 9-12 feet x 4-6 feet for some of the battles with a corresponding requirement for scenery. This is the whole point. If I can get to that point then essentially with whatever rules I ever use I will be able to field two decent size armies. I will be set up for good. 

The Bull Run size battle will be a good half way point to reach for with my modelling. 

Despite my immediate concern over the painting logistics I think the pressure from Lincoln would be too much and for historical accuracy I roll for an attack. McDowell fails for this turn but already the conveyor belt for infantry stands is back in motion. 


Heintzleman who is currently at Evansville in Illinois manages to activate (roll of 1 on an initiative 2). A leader can travel normally by rail without having to use a rail point. He moves to Rolla to take command of  the Trans-Mississippi theatre. 

That ends the Union movements and the weekly turn. I will update the living tracker. If the Union can make a combat initiative roll next turn they can attack ! 


Confederate Order of Battle for the Campaign First Manassas

  I have not managed to post at all on this website since before Xmas. Life has got away from me a little bit with my parents who are unwell...