Monday 4 December 2023

Union Order of Battle for First Manassas or Bull Run


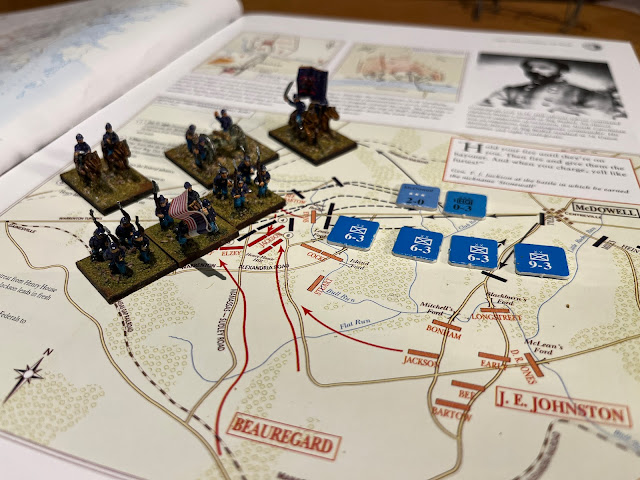
I am back into planning mode for the next tabletop encounter in my American Civil War Campaign. Above I have laid out the counters for the union side under McDowell's command from the hex that has attacked Manassas Junction. I am referring quite often to the Atlas of the Civil War edited by James Mcpherson. You can pick up a soft back A4 sized version of this relatively cheaply on Amazon which was very useful. 

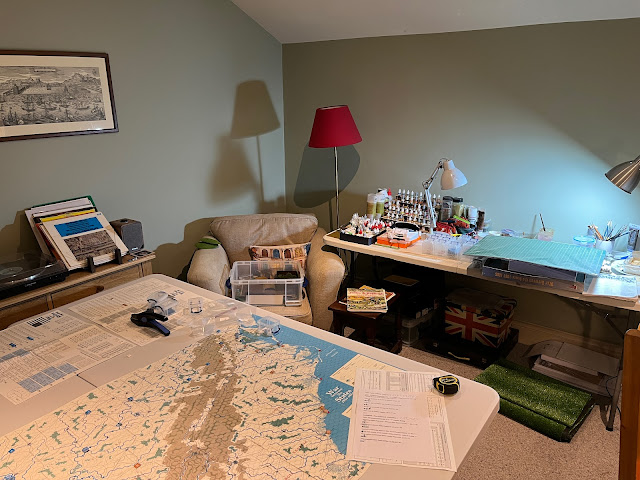
In case you think I am organised a quick shot of the current state of my study should disavail you of that notion. I have managed to find a way to fit in three 6 x 2.5' pop up tables together with my desk and armchair so that I can continue painting and keep the WBTS map set up to play out individual campaign turns. I  do not have room for the production spirals which I keep on roster. I have a system with marked up bags for the counters and of course my full webpage rosters which does allow me to move the maps around the house squatting where I am welcome. Production is now taking place on the roster with counters being assigned to ziplocks. The main front room with its dining table and lounge area in front of a tempting open fire which can take a sizeable battlefield table will be off limits this side of Xmas. I have retreated to my study ! In some ways it's a cosier existence. I need to get some more themed pictures up. 


Lots to work through. 

I thought I would determine a date for my battle in the first week of August and opted for D6 + 1. A throw of "4" results in a date of 5 August 1861. A little over 2 weeks from the real event on 21 July 1861. I have already determined with a dice roll that the battle will commence with a Union attack somewhere at 11 am. 

So the union counter Order of Battle begins with the commander  McDowell *** 2-0 who sits on top of  the First  Corps HQ counter. As a *** Corps general McDowell  can command up to 3 divisions using the HQ together with 1 further division all in the same or an adjacent hex (only when using the HQ).  In this case he is stacked directly however with I9, I6, I6, I6. So three fairly average sized divisions of 6,000 men and one oversized division of 9,000 men. I am going to allow each divisional counter on either side a divisional commander for tabletop purposes only which we can name for now and which will operate under normal V&B rules (adding 1 to morale if attached). As the divisional leaders will not operate as counters on the map if they suffer a casualty I will treat that as a wound that takes them out for the rest of battle only rather than applying any additional jeopardy for the campaign. Should a side attach a Corps or Army level commander and suffer a casualty (McDowell, Beauregard or Jo Johnston) then we can roll for medium to long term consequences. This will allow both sides to order and operate their forces on the tabletop and give me a good game.

All of the Union troops present are Green, so morale 4 and "Poorly Trained  No Elites" at this stage. The only veteran original counter in the East for the Federals is the I3 for the 6-5 US regulars in Washington (which might be modelled as 2 x 3-5 on the tabletop. The simplest way to fill out the Order of battle would be to have two brigades in three of the divisions (so 2 x 6-4). This would require the least amount of actual painting. Looking at the actual Order of battle for the Union at Bull Run there were in fact 5 divisions. One had no brigade structures so was a collection of volunteer regiments or battalions as it were and the four organised divisions (First, Second, Third and Fifth Divisions) had 4, 2, 3 and 2 brigades (respectively). So broadly 3 brigades for each Union division would be more accurate. An average Brigade strength was about 2-3,000 men dependent on the strength and number of constituent regiments. A full strength civil war regiment could be as many as 800-1,000 men at the beginning of the War and especially on the Union side. I think then in order to have a decent number of manoeuvre units for the Union on the table I am going to model each I6 counter as 3 x 4-4 PT NE brigades. The I9 brigade I could have 4 brigades as 2 x 5-4 PT NE and 2 x 4-4 PT NE. That gives me 13 brigade stands in total to produce. 

In terms of artillery I am going to give each division its own brigade of artillery and retain a Corps artillery stand with the McDowell. The Corps artillery will be rifled (2-5 R-F PT) and the Divisional artillery can alternate between "heavy" and normal smoothbore field pieces (2-5 SB-H PT and 2-5 SB-F PT). The Field, "F" pieces can be parcelled out as Designated Guns "DG" as a point for two brigades. I think I will retain the artillery stands as they fun to have on the tabletop. 

I need then 4 divisional commanders  to operate as command bases and some brigade commanders to attach as names to each of the 13 brigade stands. Heintzelmen is currently in the West chasing Price across Missouri so if we used the 4 remaining historical Divisional commanders from Bull Run these will be Tyler, Hunter, Runyon and Miles.  I will fill out some colour and background for each of these divisional commanders as I assemble them the stands for the tabletop. Some familiar household names will appear as Brigade Commanders the war commences.

Union Army of Northeastern Virginia (effectively a Corps organisation under the rules) 

McDowell - *** Corps Commander -  "1" rating. Technically a "0" rating. McDowell should not provide any improvement to a unit's morale during the battle if he attaches to it but he can of course assist with rallying etc. I think I will however allow him to attach with a value of "1" as it may be fun to put him in jeopardy ! The real worth of on map counter commanders is their ability to organise and move units. 

Artillery Reserve (Maj.  William Barry) 1st United States Artillery 2-5 R-F PT (No exhaustion)

First Division - Brigadier General Tyler - "1" rating Exhaustion 7 

First Brigade (Col. Erasmus Keyes) 1st, 2nd 3rd Connecticut & 2nd Maine 5-4 PT NE 

Second Brigade (BG Robert Schenck 2nd NY Militia, 1st and 2nd Ohio 4-4 PT NE

Third Brigade (Col William T Sherman) 13, 69, 79 NY and 2nd Wisconsin 5-4 PT NE

Fourth Brigade (Col Israel Richardson) 1st Mass, 2nd & 3rd Michigan, 12th NY 4-4 PT NE  

Divisional Artillery Brigade (Col Romeyn Ayres) 3rd United States Artillery 2-5 SB-H PT 

Second Division - Colonel David Hunter - "1" rating Exhaustion 5 

First Brigade (Col. Andrew Porter) 8,14 and 27 NY 4-4 PT NE

Second Brigade (Col Hobart Ward) 1st 4th Michigan, 11th NY 4-4 PT NE

Third Brigade  (Col William B Franklin) 5th, 11th Massachusetts, 1st Minnesota and 4th Pennsylvania 4-4 PT NE

Brookwards NY Artillery Brigade (Col Brookward) 2-5 SB-F PT

Third Division - BG Theodore Runyan - "1" rating Exhaustion 5 

First Brigade (Col Orlando Wilcox) 1st, 2nd 3rd New Jersey & 41st NY 4-4 PT NE

Second Brigade (Col Ambrose Burnside) 2nd New Hampshire, 1 and 2 Rhode Island 4-4 PT NE 

Third Brigade (Col Oliver Howard) 3rd, 4th, 5th Maine & 2nd Vermont 4-4 PT NE 

Rhode Island Artillery (Col William Reynolds) SB-F 2-5 PT 

Fourth Division - Colonel Dixon Miles  - "1" Rating Exhaustion 5

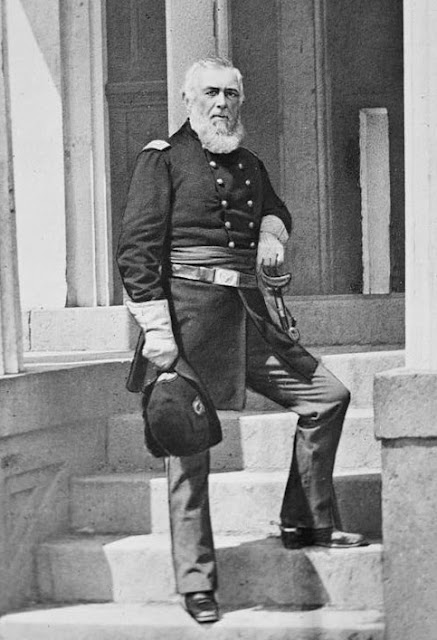
Above : Colonel Dixon Miles at Harper's Ferry  (see attribution at site footer

First Brigade (Col Louis Blenker) 8, 29, 39 NY 27th Pennsylvania 4-4 PT NE

Second Brigade (Col Thomas Davies) 16, 18,  71 NY 4-4 PT NE 

Third Brigade (Col Calvin Pratt) 31, 32, 38 th NY 4-4 PT NE 

Divisional Artillery Brigade (Col Charles Griffin) 5th United States Artillery 2-5 SB-H PT

That gives me a painting target of a further 11 Union 3" square brigade stands and 4 more artillery stands together with their limbers if I want the whole look to be good ! In terms of 20 mm square stands with 4 infantry figures that 44 and stands or 176 figures. I will also need 4 divisional command bases and a Corps style command base (3 figures). I wondering whether to switch to round bases for commanders. 

My next post will be on the scenery while I crack on with the above this side of Xmas.

See you in hell Billy Yank ! See you in Hell Johnny Reb ! 


Saturday 2 December 2023

Week 1 August 1861 (Union Turn) - First Major Clash in the East


Above : Henry Halleck (see site footer

"I will not attempt to hamper you with any minute instructions" Henry Halleck to John Pope in respect of the capture of island number 10

So "Old Brains" is installed as Chief of Staff in Washington early and it's time for the chit draw for the first turn of August 1861. Union threats are starting to brew in both the East and West. In North Virginia  a strong force of 27,000 men organised as a Corps under McDowell has crossed the Potomac and has been organising itself for several weeks. This strong force is preparing to attack around 29,000 men gathered under the combined leadership of Beauregard and Jo Johnston at Manassas Junction. 


In the West a number of further threats are brewing. An advance guard under McLennan is at Cairo with options to move on Polk at Union City. In Missouri a battle hardened force of 7,000 cavalry and infantry under Heintzleman remains at Rolla and could continue to press Price and the remnants of the Missouri State Guard who have slid across to Ironton. On the Ohio River Stoneman has arrived in theatre to take command of the departmental garrison at Evansville. From there the Union may attempt to a swift invasion of neutral Kentucky. 


The clock is always ticking for the Union politically under the Strategic victory point situation. The Union must capture four victory point cities East of the Mississipi by August 1862 or the Confederates will clock up victory points each turn and eventually be able to successfully roll against the tables for a victory or Foreign Intervention to bring the War to an early close. As a reminder the main target cities for the Union are Richmond, Nashville, New Orleans, Memphis and Atlanta. The second tier of cities include Charleston, Chattanooga, Corinth, Knoxville, Mobile and Vicksburg. This should inform the axises of attack for the Union. Clearing the Mississippi should be a key aim for the Union and from both ends if possible. Seabourne assaults could be attempted for each of Charleston, New Orleans and Mobile. Finally an overland campaign through the heart of the confederacy to take Nashville and then to cut the central rail line and take Knocksville, Chattanooga and Atlanta could be attempted. The Confederacy will always have limited resources that must be husbanded and cannot defend in strength everywhere. In some ways however both the Strategic targets and the availability of Headquarters organistions and competent leaders with initiative will guide the Union sides' progress. 

Kentucky's neutrality is an annoyance. If the Union moves through into the State its legislature will declare for the Confederacy however a swift campaign could then take place to secure the main cities and the Tennessee and Cumberland rivers. The Personnel Point bonus to the Confederacy is not massive.  It effectively provides roughly 60 Personnel Points to the Confederacy over 6 months in comparison to 30 for the Union so the difference is not that great. This is really not more than a couple of divisions. Cessation will however deliver 6 towns and cities to the confederacy which will  produce Production Points. This resource is set to take a leap up in October as the cotton harvest is brought in. This could be worth a small boost to the cause until they are taken back. Given that the Confederacy is unlikely to invade the Kentucky themselves for fear of losing that advantage and giving a gift of yet more resources to the Union has time to gather its forces before a swift invasion. 

On balance in the West for now I think that Heintzelman should continue to pursue Price and then combine with McLennan to seek to knock out Polk and dislodge the Confederate stronghold at Union City the top of the Mississipi. I have noted from the rules that despite Missouri declaring for the Confederacy the railcnet in Union still belongs to the Federals. 

Strong naval forces will be arriving in theatre in a matter of months so early 1862 could be the time to attempt the invasion of Kentucky. In fact a river bourne invasion would not immediately violate neutrality if aimed at Nashville bypassing Kentucky and using the Tennessee and Cumberland rivers. I think it better to move swiftly on the key cities that would contribute to the Confederate cause, hold territory and threaten Nashville. Nashville would be the first major strategic loss for the Confederacy. 

On the  Confederate side the other hemisphere of my strategic brain keeps coming back to the simple maxim that the Confederacy does not need to "win". It just mustn't "lose". The Confederates have there a new nation - it simply needs to dig in and hang onto it for now. Concentrating forces and blocking potential moves and reinforcing key strategic cities is the aim of the game. For example why attack Ivrvin McDowell North of Manassas ? Richmond and some of the small towns and cities such as Fredericksburg and Lynchburg, Charlottesville and Gordansville  need to be defended but there is no immediate strategic advantage to throwing McDowell back across the Potomac. Better to continue to consolidate forces and focus on having an advantage when attacked. The topography of Virginia presents the Confederates with a series of East/West rivers providing natural defensive lines. 

Initiative Chit Draw

I use my wife because I can feel myself hoping that the Union remains stalled in North Virginia - I have to paint those bases at some point ! Also I think I know what each Chit looks like now even if reversed. Again I swear that my wife is a zealous abolitionist and Lincoln loving Republican. The Confederates opt for the safe "2" in parenthesis under the WbTS boardgame rules. Of the remaining 3 options - "0", "1" and "3" Jane picks the "3" from the cup. The Union takes the initiative and has 3 guaranteed initiative moves which is remarkably useful given the very low initiative of Union commanders to get anything done independently. 

Union Moves 

(1) Heintzleman ** and the I5 and C1 counters he is stacked with continue the pursuit of Price backed by (2) the supply train.  They move across to A2415 and A2414.  Heintzleman can order a division and a brigade as a ** Divisional commander so moving the supply train to ensure that he can engage in combat healthily when he catches Price will cost another chit initiative.


(3) One of the I5 divisions at Harpers Ferry has moved to join Banks at Baltimore. Incidentally the Federal  Naval Transports are nearby. The Northern papers trumpet the potential for seaborne invasions along the East coast of the Confederate States alerting the Confederacy to the potential danger. Should the Confederates then use valuable resources to garrison each city on its coastline ? I have been toying with the idea of building up garrisons where I can to create a fighting reserve that can react to threats. The arrival of a substantial force threatening key cities such as Charleston or Atlanta would require a significant reaction that would then of course weaken resources elsewhere. The Union has the advantage of the Sea, the Ohio river and eventually the Mississippi (if it can take it) creating a contiguous exterior line of communication from where it can assault at will. This is Winfield Scott's Anaconda plan in its full glory. 

There are of course the potential for initiative moves for the union as well. 

Only Stoneman at Evansville makes his initiative roll (he gets a “2”). I think he needs a larger force to move into Kentucky than the 6,000 militia and garrison he currently has. Potentially he can take some militia with him to create a depot when he does move but he should take at least a strong infantry division to have any chance of success. This will be the thrust towards Nashville when it is ready. 

The more you "run the board" for the Union  to generate threats to the Confederates the more you realise that the Confederates are constrained strategically to defence and possibly counter punches  e.g. in the form of raids in strength in the North or to retake territory in the West. The experimental political victory point rules I have adopted from WbTS are particularly elegant at capturing this "mood" to proceedings.  

Combat Phase 

Heintzleman is not yet in a position to attack Price. Again Mcgruder has a series of increasingly agitated telegrams from Lincoln demanding that he march on to Richmond by destroying the confederate main battle army right in front of him. 

Will there be any progress in the main battle theatre in Virginia ? 

The union rolls a 1 which is good for  McDowell's initiative of 2. McDowell is stacked on a Corps HQ and as such can attack with all 4 divisions with him - the 3 x I6 counters and the I9 counter - 27,000 bayonets. Facing him are Beauregard and Jo Johnston with fully 29,000 men. Finally the slow preparations of Union have resulted in a clash. 

This is the mid-sized encounter I have been looking forward to as a tabletop project to take my gaming resources forward  - a clear step up from the  Battle of Rolla. I will need to (1) design and dress the tabletop. (2) Draw up Orders of battle and organise units within my divisions - naming the stands and regiments and (3) decide on how I deal with the battlefield rules for the day and the arrival of units and so on. There are a number of rules questions for me to consider. The battle should be large enough however for me to properly divide up the forces into “divisions” or forces and assign wings or a strategy under the Road  to Glory system. I will allow each side sufficient battlefield divisional commanders within their counters as well as the *** and **** generals present as overall Army/Corps sized commanders. 

Painting wise I will need to produce probably half a dozen more 3" infantry  stands for either side to be able to play this but ultimately I will need upwards of 30 stands a side for the biggest battles in any event. In terms of 20 mm square bases I should now just get the production line rolling again. I have taken delivery of some very nice Black Hats and Zoaves that could make an appearance. I am good for cavalry. Stuart will be present with a small brigade of cavalry however there are no cavalry on the Union side. I will need probably a fairly significant amount of artillery unless I model this at Divisional Guns. 

In terms of scenery I think I need two “tiers” of hills so some foam board shapes that can sit under my cloths will win the day. My existing collection of hills can then just produce the second tier or standalone hills. Henry Hill was of course the focal point of action at Bull Run on 21 July 1861 but it needn't be in this encounter.   I also need a stone bridge and possibly just more trees again ! I am not sure yet how big to make the tabletop.

To keep things simple there is a good map for a Bull Run Scenario on the Volley and Bayonet  internet pages. But this really covers an area dictated by what the two sides on the day actually did. In reality both sides tried to turn the left flank of the other by an attack. This was called off on the Confederate side to defend against the Union assaults of Henry Hill. All reserves arriving at Manassas Junction by rail were eventually thrown this way (notably Jackson's first brigade) prior to general assault by the Confederates leading to a Union collapse. 

I have also ordered a second hand copy of Eastern Battles which supports the Fire and Fury system. That should also have a map and order of battle I can lay onto my counters. This is the moment that the troops become real and take on a character and identity. There is a wealth of information available on the internet obviously. I am taken by the concept that the Union has a multitude of potentially fords and crossing points along Bull Run from which it can attack. The overall concept for the scenario could be the the Confederate needs to make its deployments and then the Union axis of attack will be determined. There is no need for complex rules for the arrival of a strategic reserve by rail as the Confederates have been concentrated at Manassas junction for several weeks. 

The full table itself could be up to 12 feet long x 6 feet  deep depending on how I orientate it. I want take in all the potential river crossings if I can. This is a great project within a project and one that will take me beyond Xmas I expect to get on the table. The key for me is to keep the battle fresh, fair and give both sides a good chance. Most of the troops will be very raw and unproven. Both sides will though naively see the opportunity for that “knock out blow”. The object of this whole campaign for me is primarily to have fun, create some beautiful tabletop battles and essentially tell a story. I should also gain some understanding of the big picture and learn some history as go along. 

I ordered a small piece of astroturf last week to have a go at some crop fields given that the battle will take place in August. My battle of Rolla was lacking in corn ! Spray painted a corn colour the Astroturf  should be quite good. The rules for corn fields block line of site until they are trampled by a crossing brigade. Perhaps I can have two versions - one for the corn standing and one for the corn trampled ! 

Time to retreat to the study/modelling room for a couple of weeks to get this on the table ! I doubt the Great Republican will allow a 12 foot x 6 foot table to appear in the "Front Room" this side of Xmas competing with the tree and dining table. 

Overall I am very excited now again to deliver a larger battle that will deliver a result in the grand campaign. Who will go limping back to the capital on this occasion as the Summer of 1861 draws to a close ? Will the Union sweep on to Richmond or will this first foray into Virginia end in the debacle of the “Great Skeedaddle” as it did historically.

There is one final thing I can decide on with a simple dice roll. The V&B House Divided campaign rules have a system for determining the start time for the fight (see Rule 8 Battles here). In August sunset is at 5 am - adding to that a roll of D6 the Union attack will not take place until 11 am. As sunset is at 7 pm the Union forces will be limited to 8 turns of action on the first day. It is possible that we could be in for a multi-day battle

See you in hell Billy Yank. See you in hell Johnny Reb ! 


Confederate Order of Battle for the Campaign First Manassas

  I have not managed to post at all on this website since before Xmas. Life has got away from me a little bit with my parents who are unwell...